When the cement was removed, we found some repairs were needed for the timber frame, including a new stud where an old one had disappeared (judging by the empty mortice), completing another stud that had rotted away for the first foot above its mortice in the sole plate, a knee to reinforce the joint between a main internal beam and a post, and a strengthening of one of the corners, where a sound main corner post did not seem very well tied in to the sole plate. It was reinforced with a flexible glass fibre rod through the timbers and a steel plate. All the timber work was carried out by William Clement Smith.

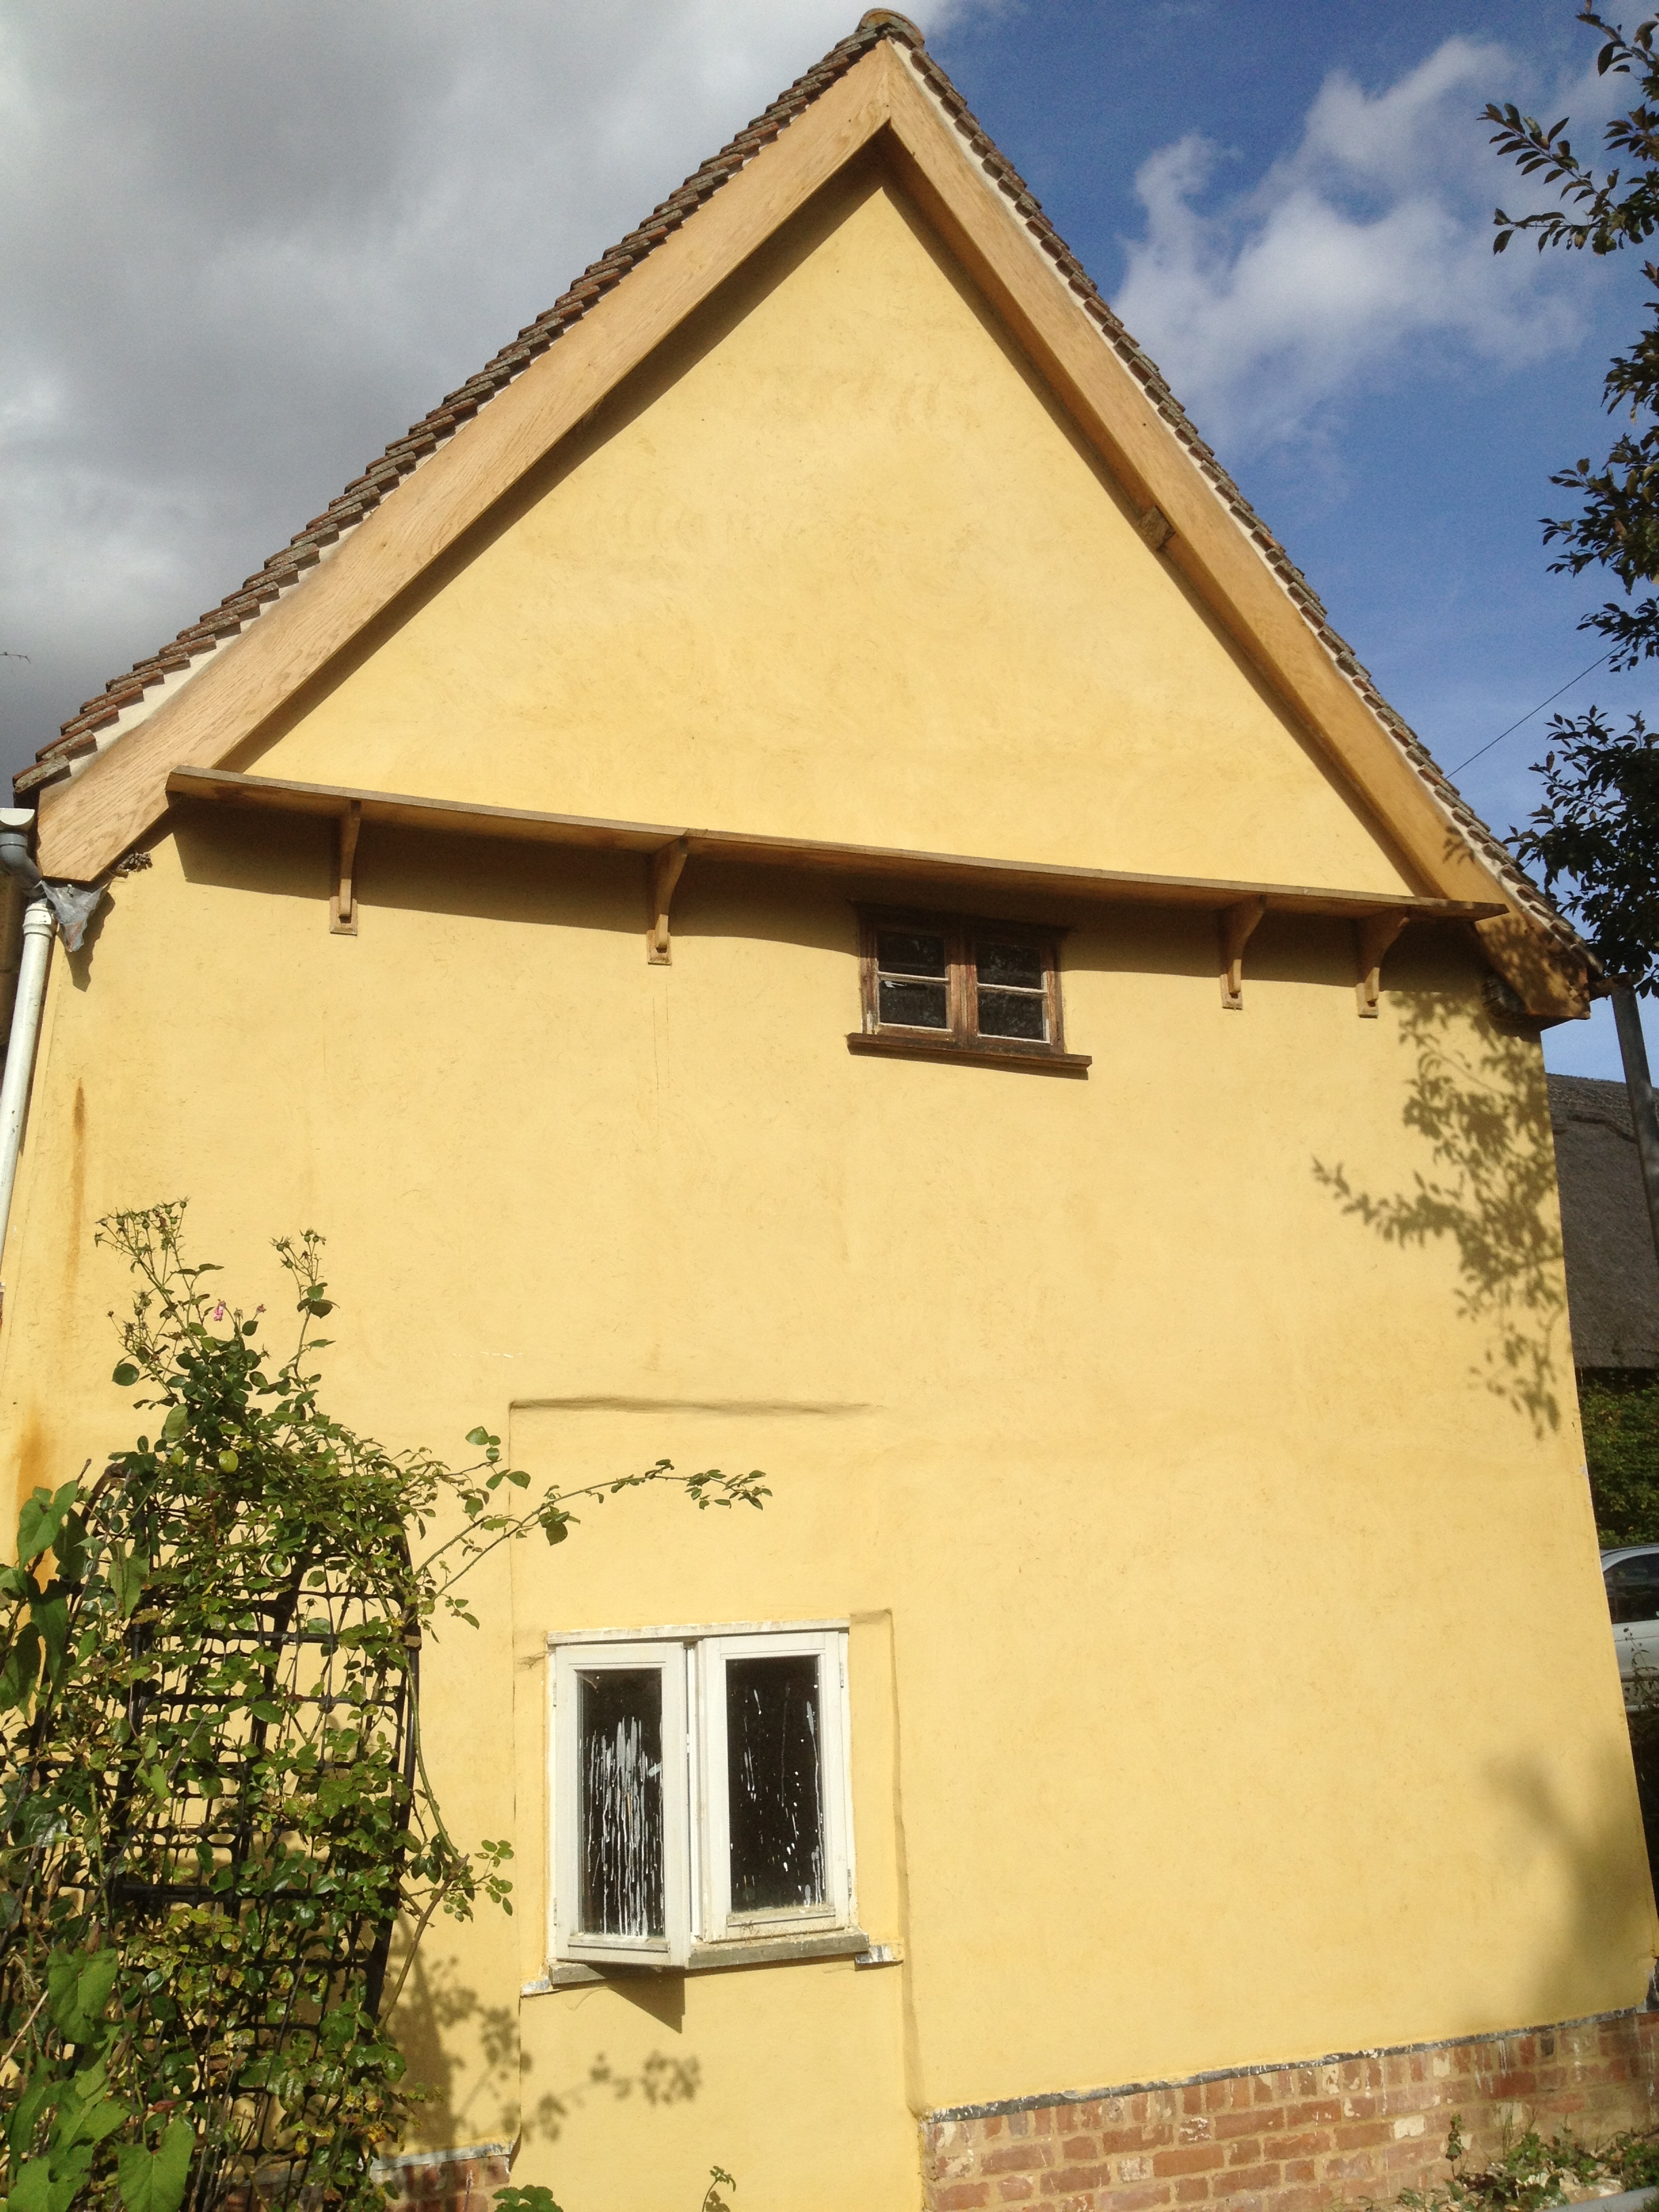
He also installed a beautiful oak pentice board above the gable wall window and another lower down on the chimney return wall, to deflect drips. The barge boards on the gable end wall were beginning to rot, so he replaced them with oak. The soffits had to come off anyway for the lime repairs, and new oak ones were also installed.
Other issues also came up, which always happens when you start removing things. A small side roof by the chimney (a couple of square metres) proved to be badly fixed to the wall when the cement render was removed, and once several rows of tiles had also been removed to fix this it became clear that it would be a good time to re-roof it, and also to put in some insulation and something to carry the water away from the back wall, where it is causing a damp patch. It was in any case on the repair list for the longer term because it leaks badly. A new oak knee, made from a naturally curved piece of timber, was installed to reinforce one of the main load bearing beams, which did not have a good joint where it met the wall. An existing rather poorly attached knee, which supports another main beam, is being replaced with a wrought iron bracket, and the front and back door frames and doorsteps, which are rotten and let in the rain, are also being repaired.
Limewash
We decided to use a simple limewash mix of lime putty and water (one to three, and one to six for the first coat ). This was intended to be a breathable base layer. It also has the advantage of being very cheap, and it can be stirred by hand with ease.
We put on four coats with one or two days between to give an opportunity for the limewash to cure. We then used three coloured topcoats – the first coat more dilute – of Ingilby’s linseed oil limewash, making seven coats in all. If we had used 7 coats of linseed oil limewash we would have had a much less breathable coating. As the gable end wall needs scaffolding to paint, the hope is that the extra coats will make it last longer.
