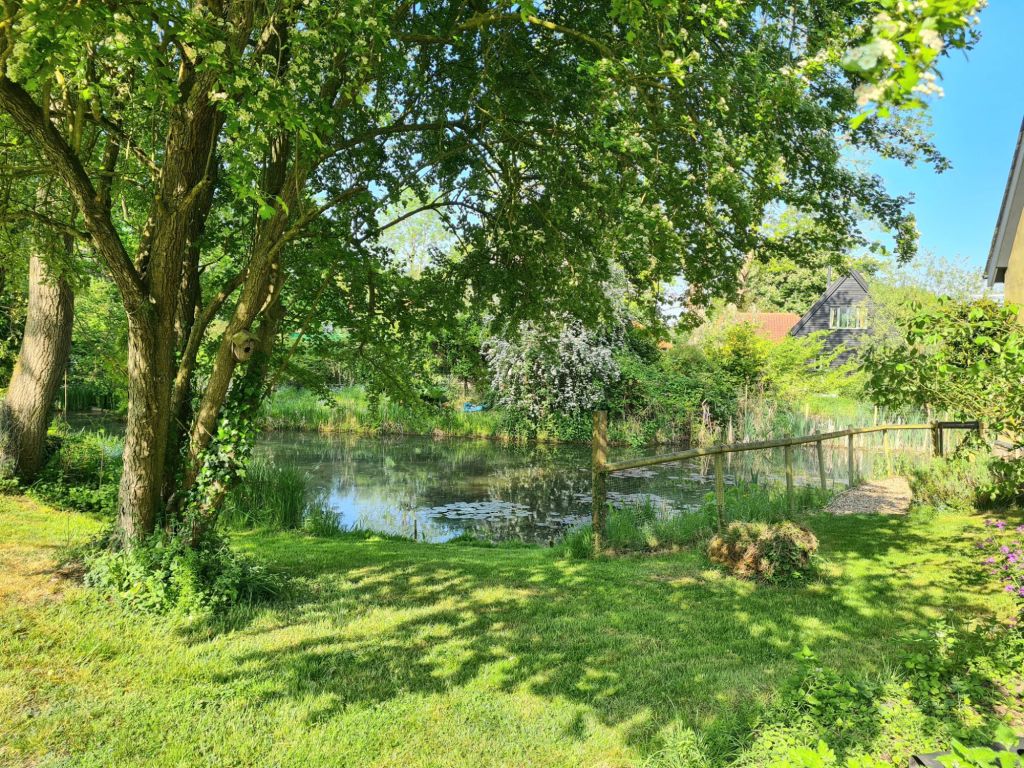
Instead of spending a lot of our time working on the house, recently we’ve just enjoyed being there, looking after the garden and pond, which together can take up a lot of time. This post is a pause for thought about what’s next.
The garden and pond are rewarding to work on, but the house now needs more attention
We’ve carried out no substantial work other than maintenance for 6 years, but there are several bigger jobs piling up that need doing, and it’s time to start thinking about them.
To begin, a reminder of what we’ve already done: major work in 2008-9 made the building habitable, and this included the replacement of rotten oak soleplates on which the wall timbers rest, and the installation of electricity, water and sewage from scratch – the little building had been a house, but was unlived in for hundreds of years. These big projects were mostly done by professionals, as was the construction of the extension in 2014.
There were also a large number of ancillary jobs that we either tackled ourselves or did with professional help and advice over the years. They included repair of damaged walls with new clay daub, removal of old cement render used by previous owners and its replacement with lime, stabilising sections of two clay side walls, lime plastering and repairing inside walls and ceilings, limewashing the whole house inside and out and a host of smaller jobs described in this blog.
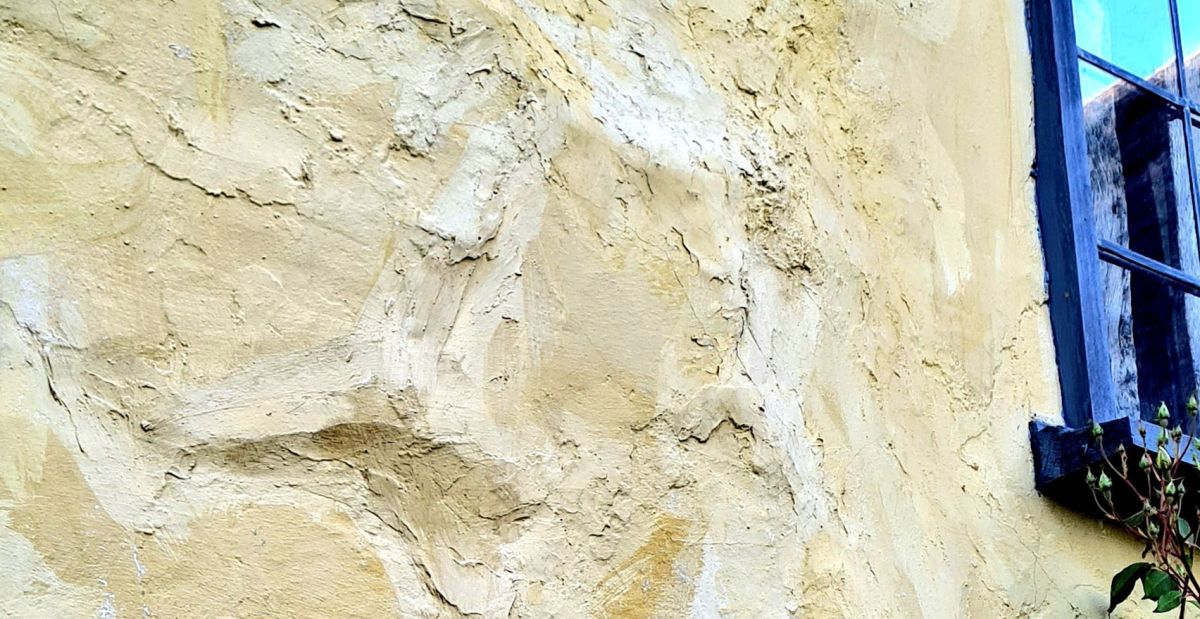
The most pressing work now is the north gable, where there are cracks and breaks in rough cement render applied in the 20th century, revealing ancient clay daub underneath. That is overdue for stripping back to the clay, which will need repairing and then re-rendering.
When we repaired the south gable we covered it in porous Savalit boards before plastering, to give extra insulation and protection, and we need to do the same again. The work will need scaffolding and professional help.
Secondly, we patched large holes in the side walls with clay in 2009. But other weak areas of the old wall material were preserved in place by using chalk lime plaster mixed with fibres to stitch over the cracks to slow further deterioration.
That was a relatively short term solution, though it has lasted a dozen years. We need to think now of more thorough repairs, which we can tackle ourselves.
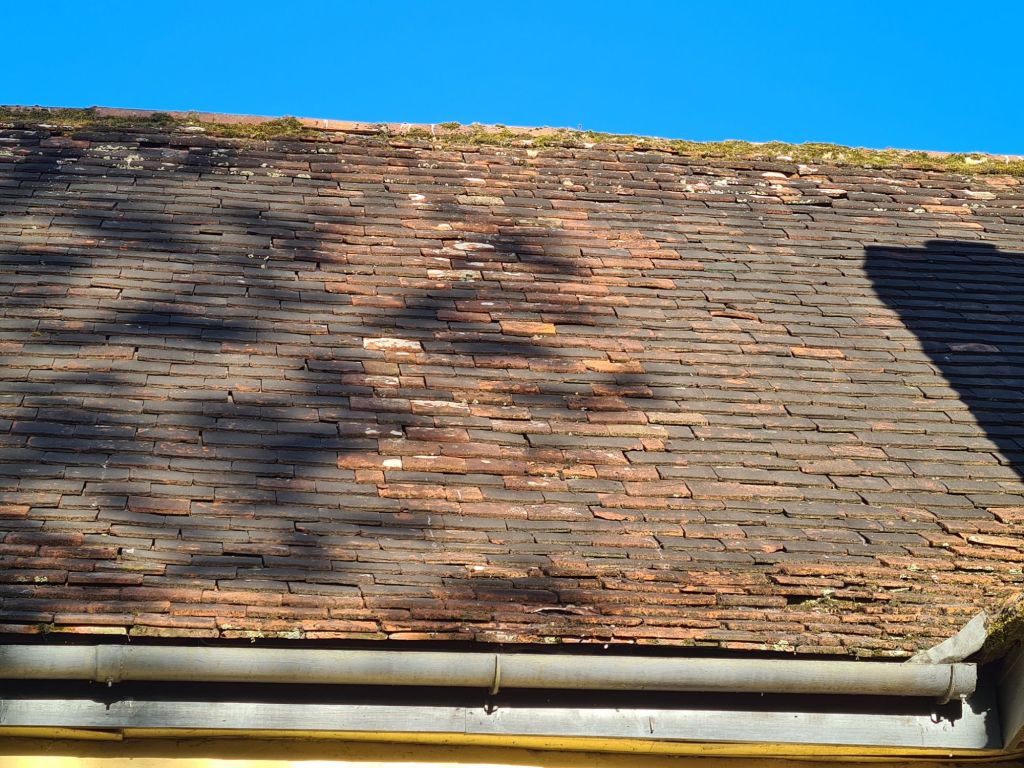
Thirdly, the roof needs attention. A worrying number of the clay peg tiles have frost damage. Luckily, we have several hundred recycled tiles left over from construction of the garage. A roofer tells us that it is feasible to replace damaged tiles, though tricky because of the way the peg tiles are laid with nails. But we want to avoid full stripping and repair, which would involve negotiation with the heritage department, and a lot more expense.
The roof does not look bad yet from a distance, but there are more missing and cracked tiles than we’re comfortable with.
There’s a list of other smaller repairs which has lengthened as we have focused on the pond and garden, so it will be good to practice on those before we gear up towards larger projects.
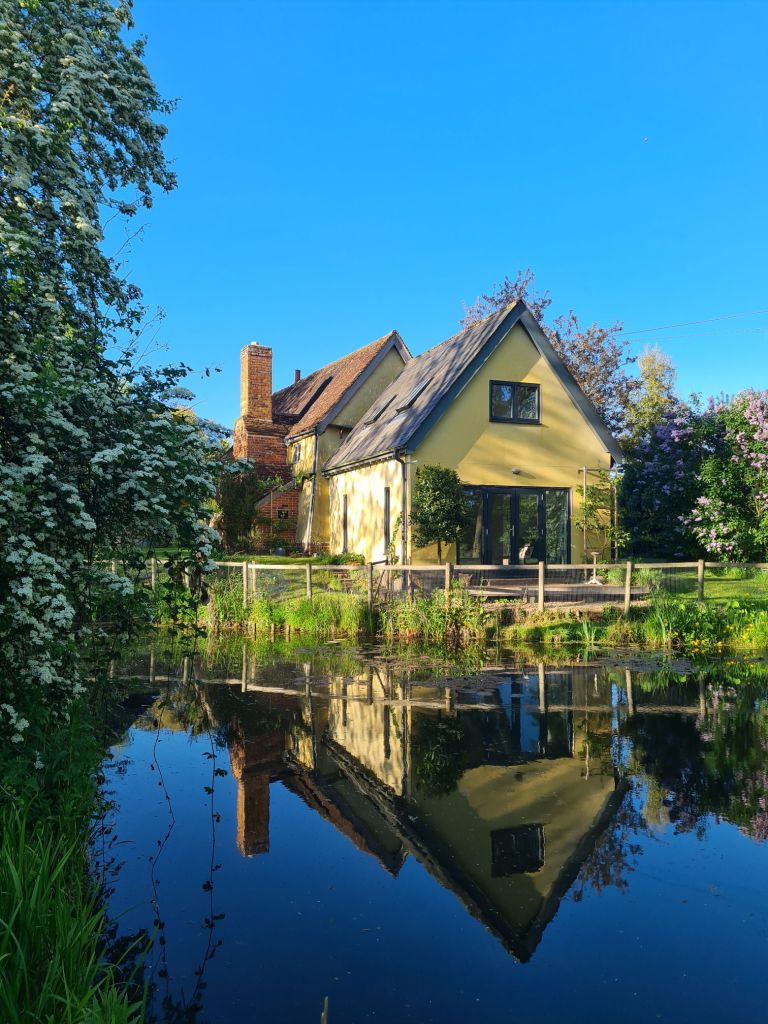
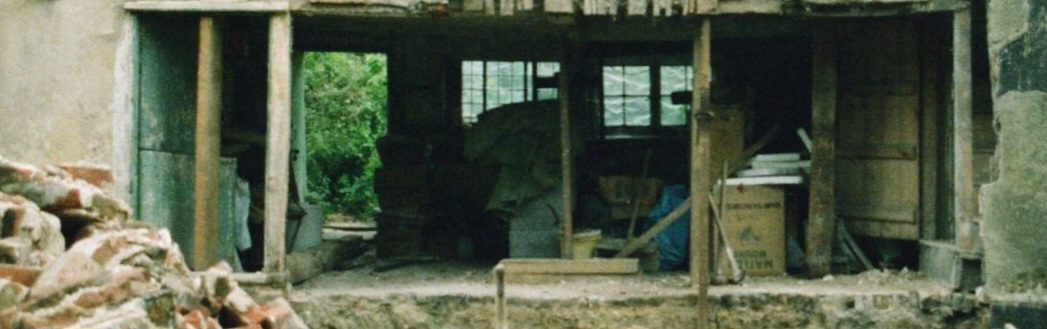
Old and new – closest to the pond is the replacement for the end of the building, which fell down well before we arrived. The 16th century building is behind.
The photos below are among some recently found by our next door neighbour, Ginny, showing work carried out by her late husband, Paul, before we bought the Old Brewhouse. His repairs and alterations were even more extensive than we realised when he first described them to us. These photos add new insights to the history of the building.
(Top) The front of the house before the plaster over two mediaeval mullion windows was removed. (Above) Rebuilding the chimney at the back, demolished because it was on the point of collapse
For more photos and descriptions of previous work on the building, follow this link.
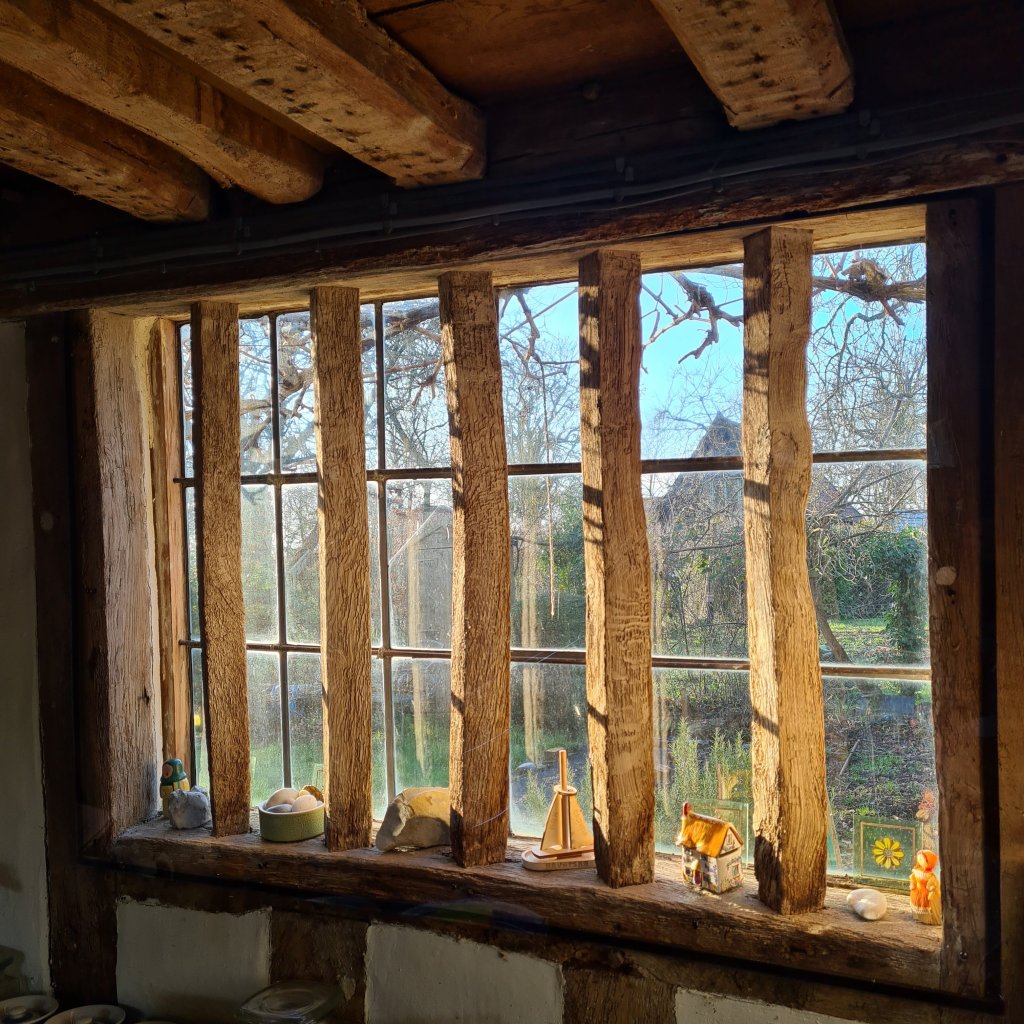
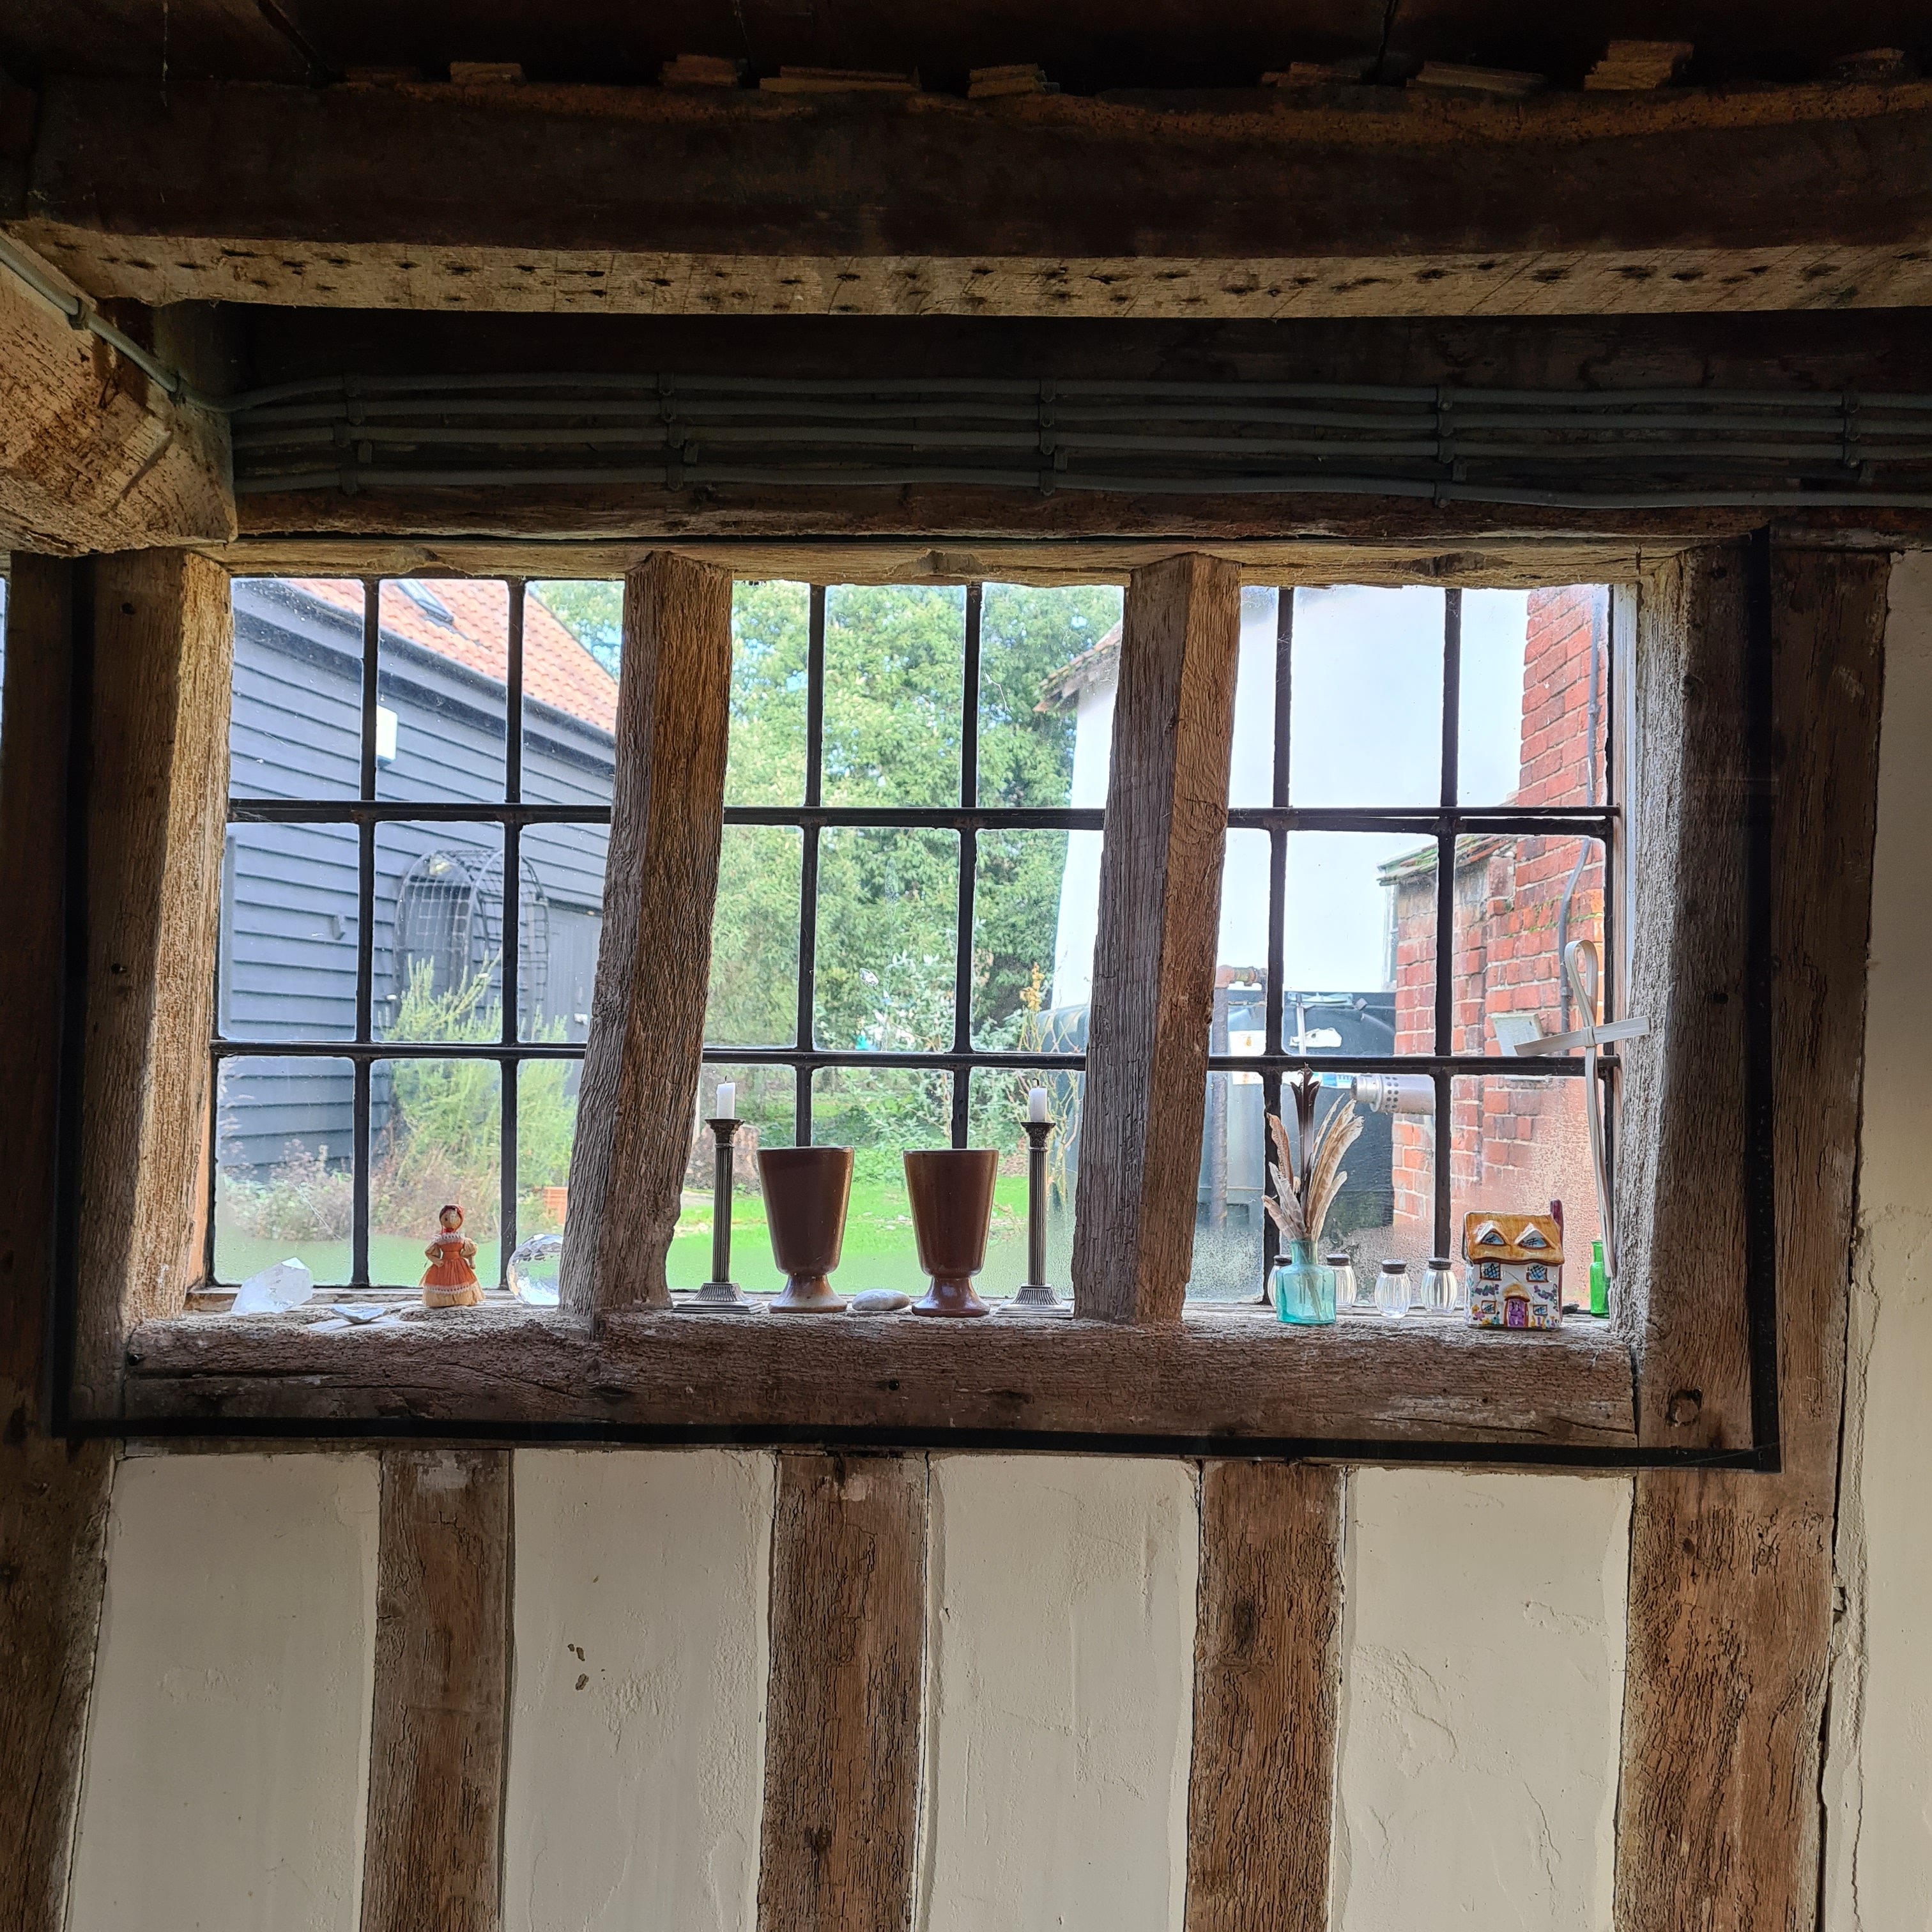
We’ve been worrying more about fire safety since we put secondary glazing on most of the old windows a year ago. All but one of our mullion windows are impossible to get through because the ancient oak bars are as strong as steel. The secondary glazing (or rather polycarbonate sheeting) makes them even more impenetrable.
Downstairs has no no internal doors, five external doors and two opening casement windows, so reassuring if any of the multiple smoke alarms go off. Upstairs, in the bigger of the old bedrooms, one big window has had enough mullions removed to make it easy to get through as an escape route.
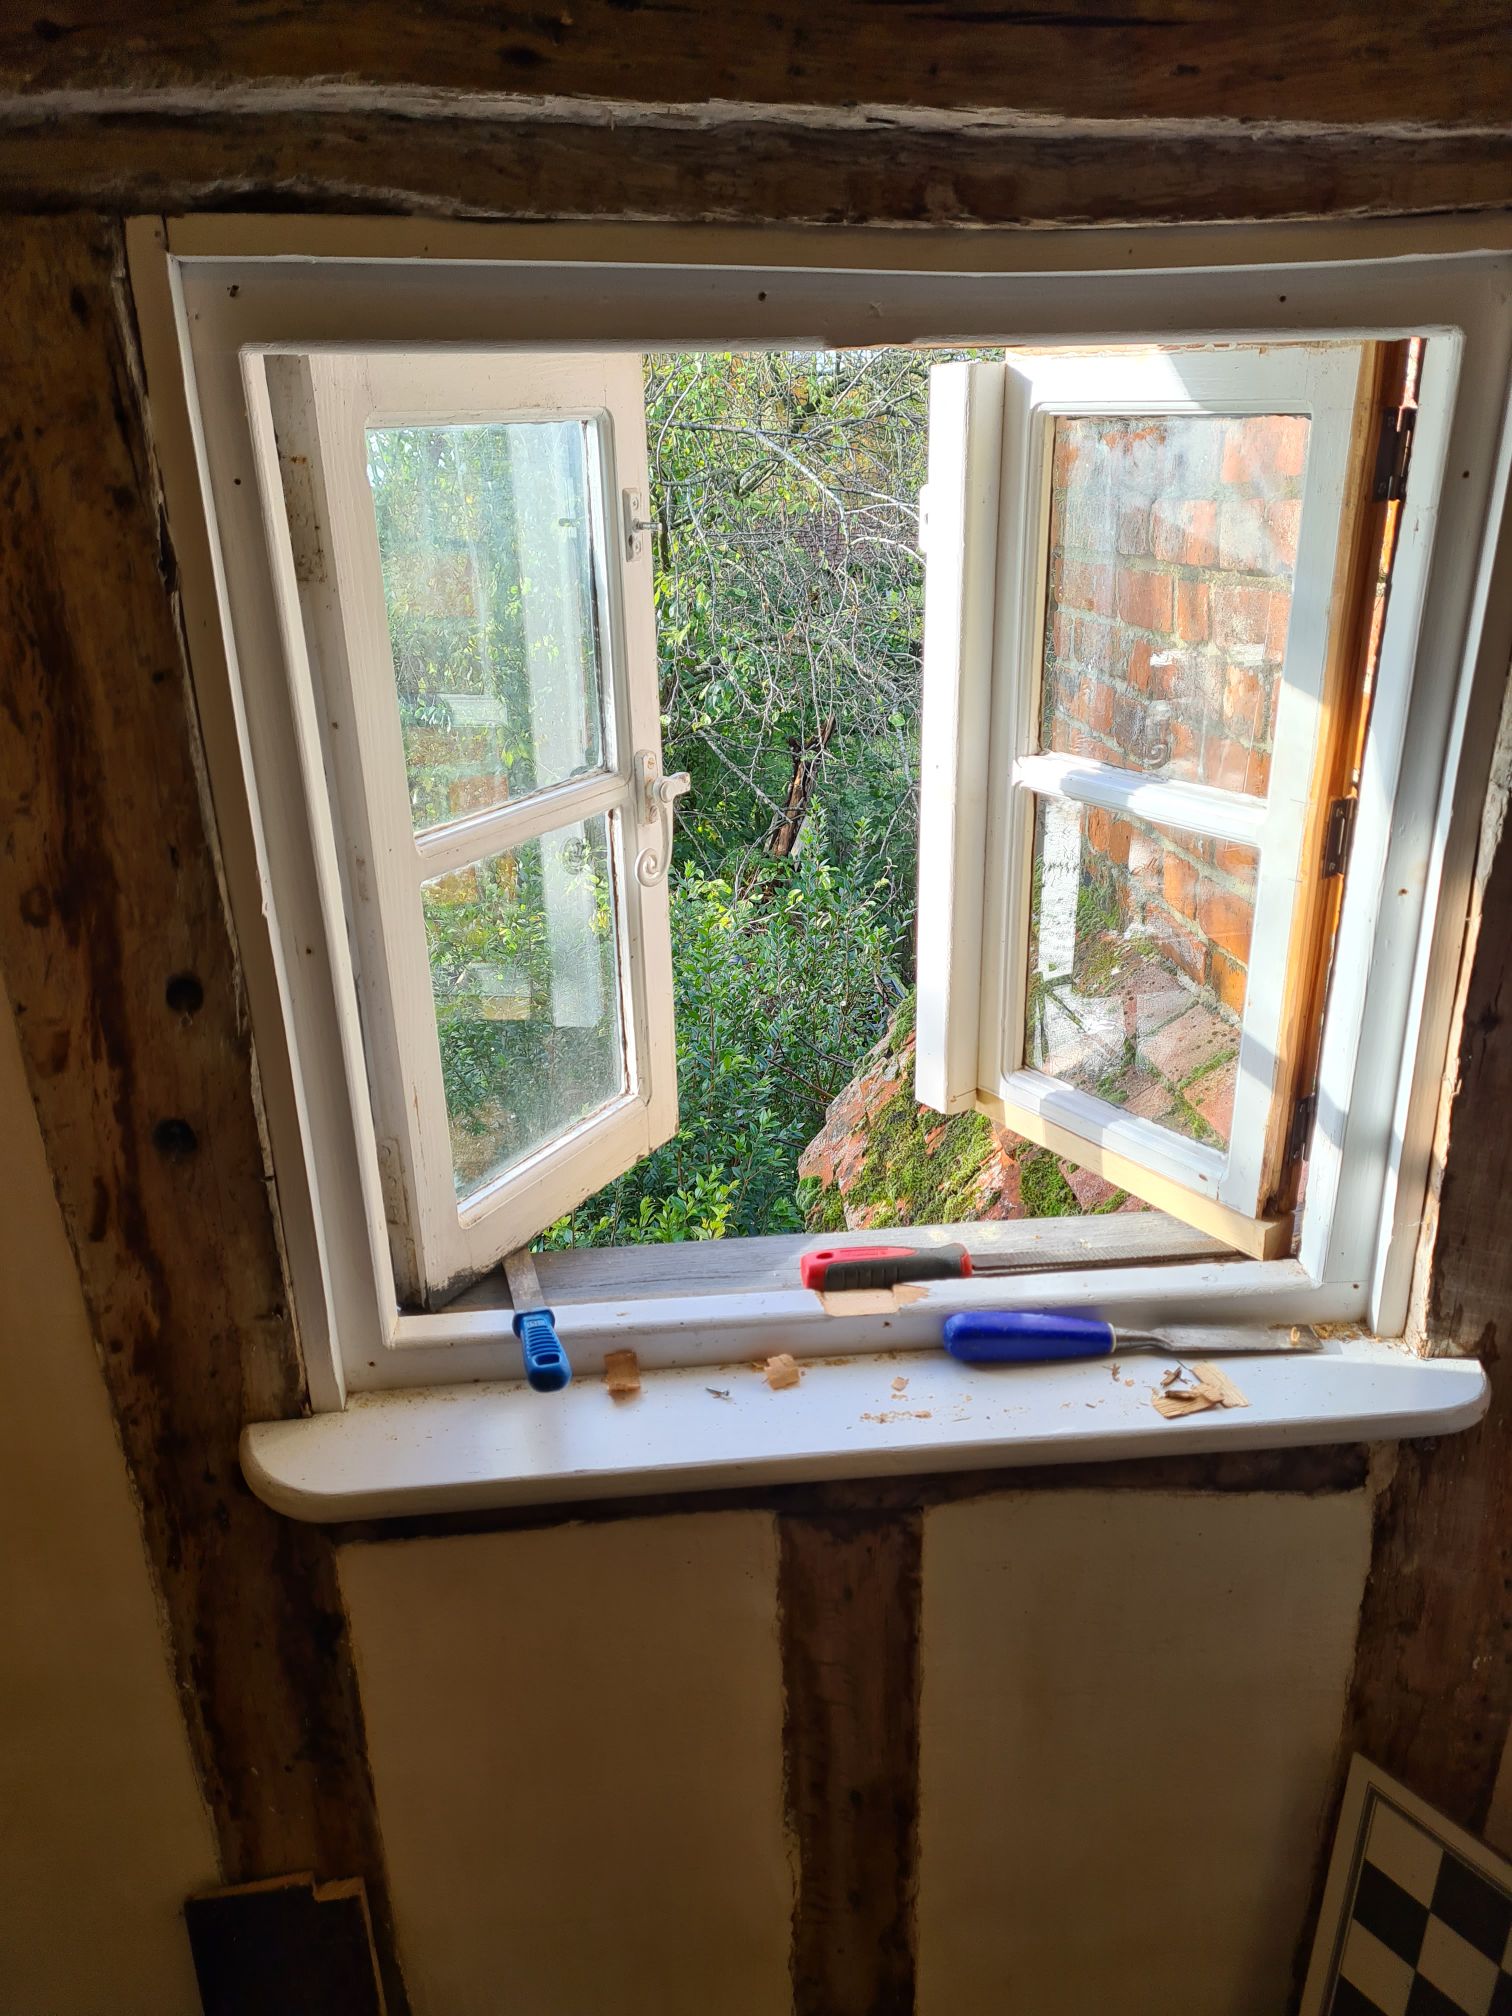
The other 16th century bedroom has three tiny double casement windows. But only one casement on each of the three can be opened – the other side is fixed. A child could squeeze through but an adult would find it a challenge in an emergency.
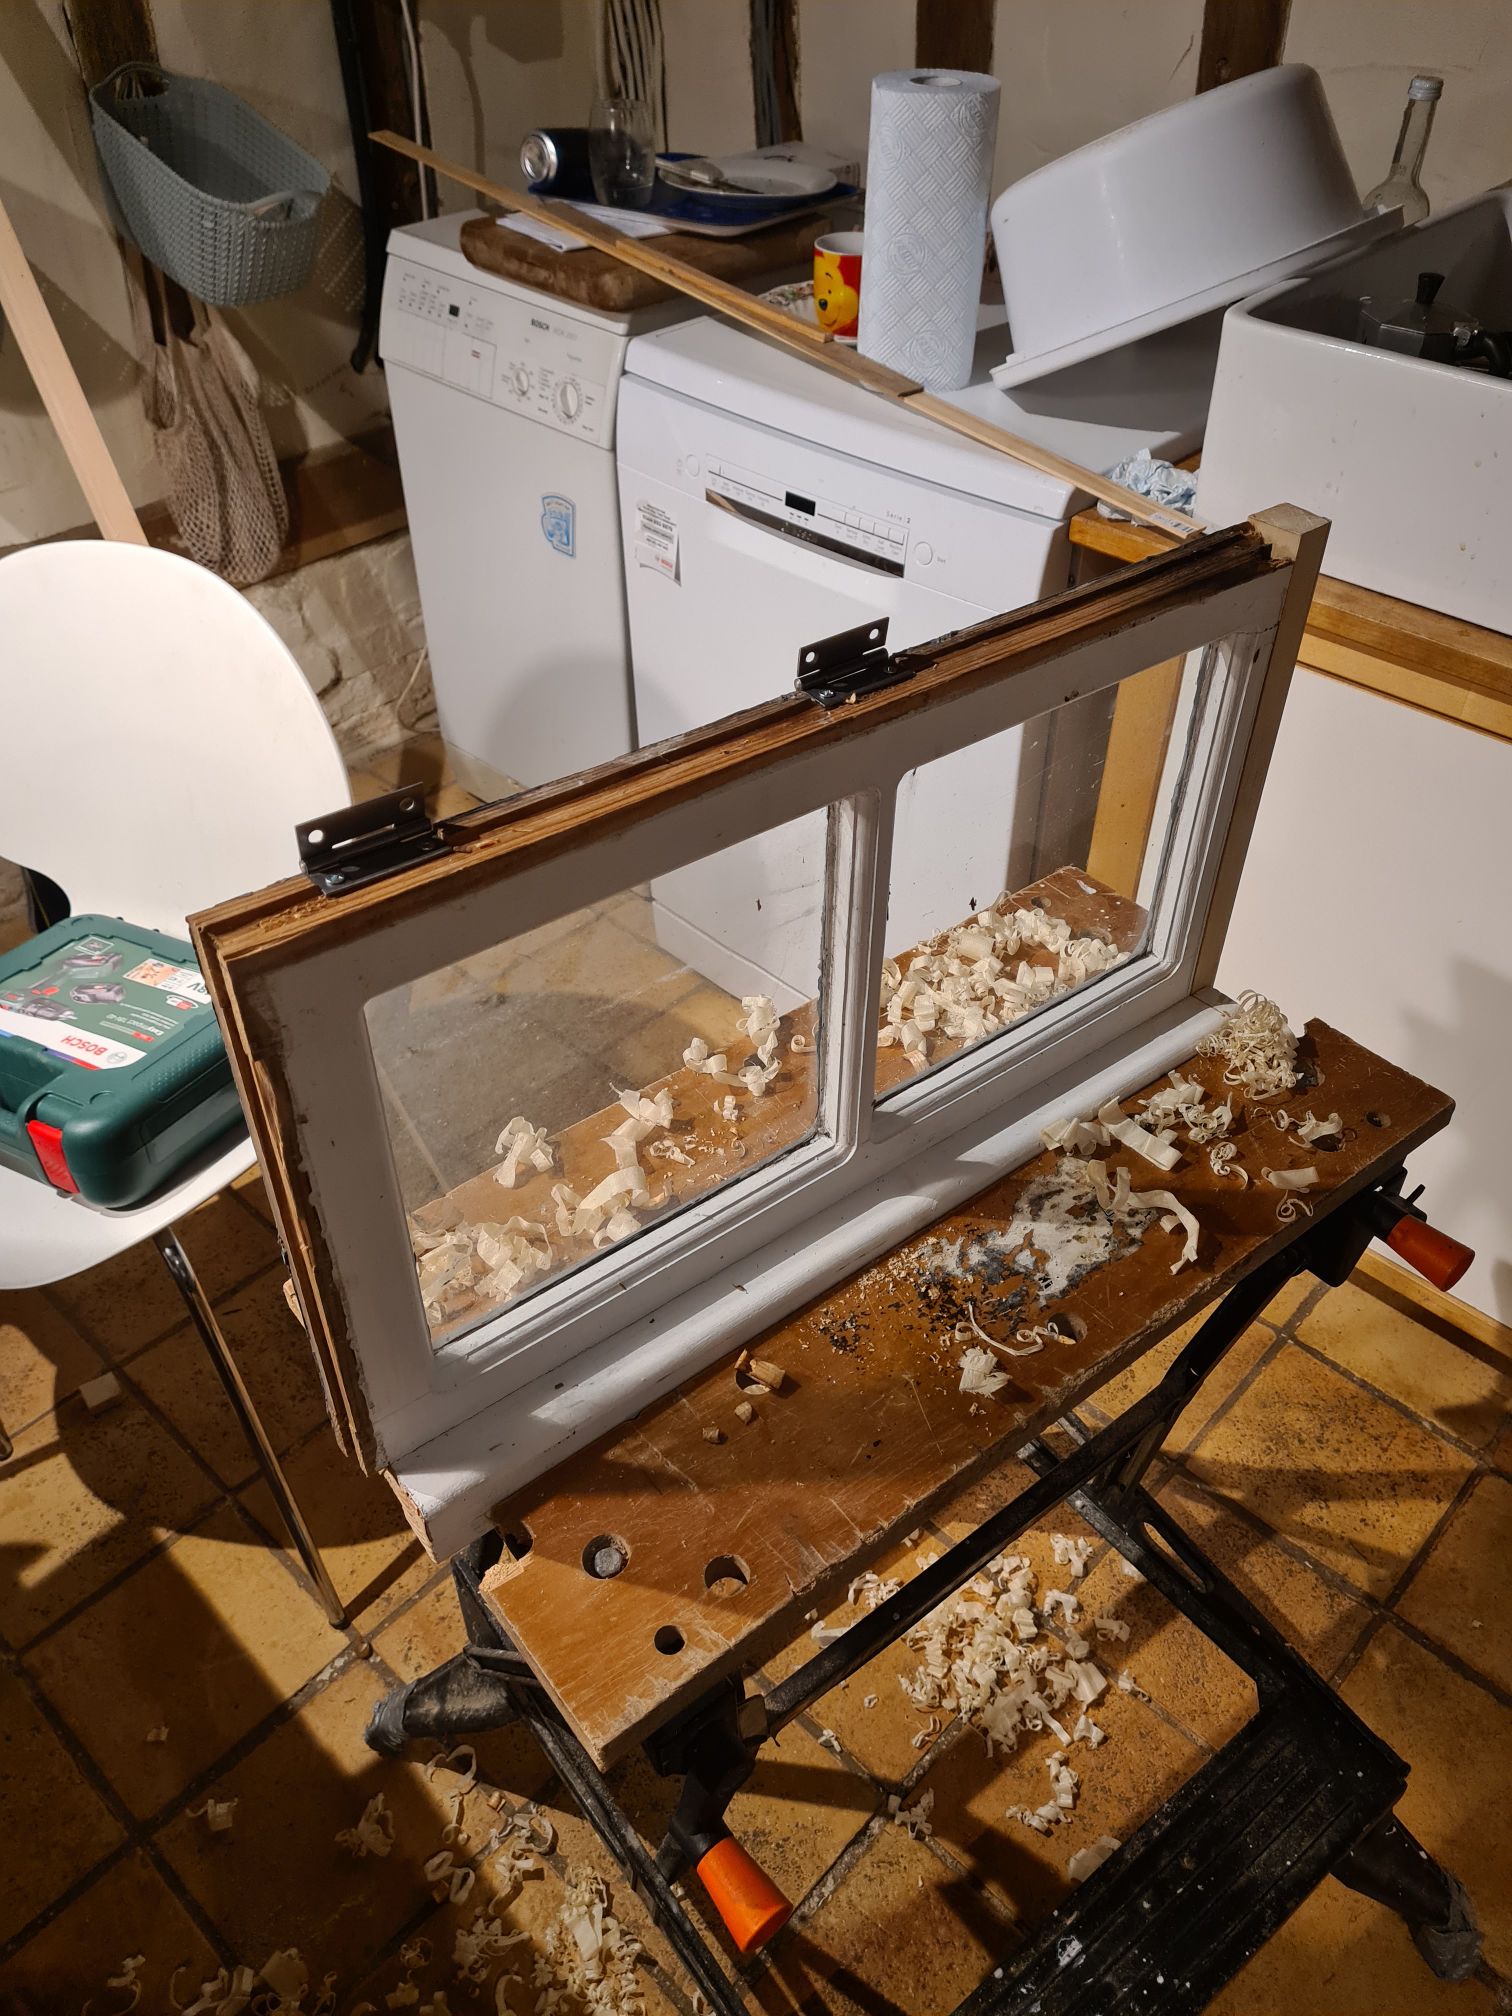
The simplest solution is to make both sides of a window open. We chose the bigger of the three, which is also the one at the back with an easy drop, to try this out.
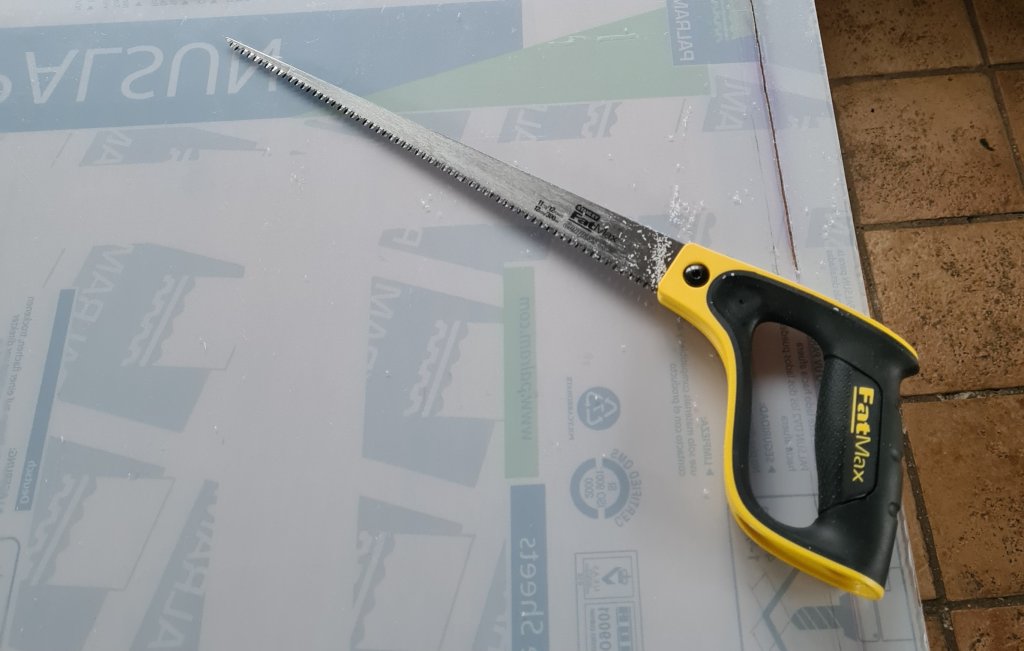
The central post (not sure if that’s the joiner’s term for it) was cut through top and bottom. The fixed side of the window was prised away from the frame, trimmed, and hinges were fitted, while still attached to the post.
It was then refitted to the window frame, with a new security latch and two bolts. So we now have a window even a large adult could get through easily. I have to admit, we should have done it years ago.
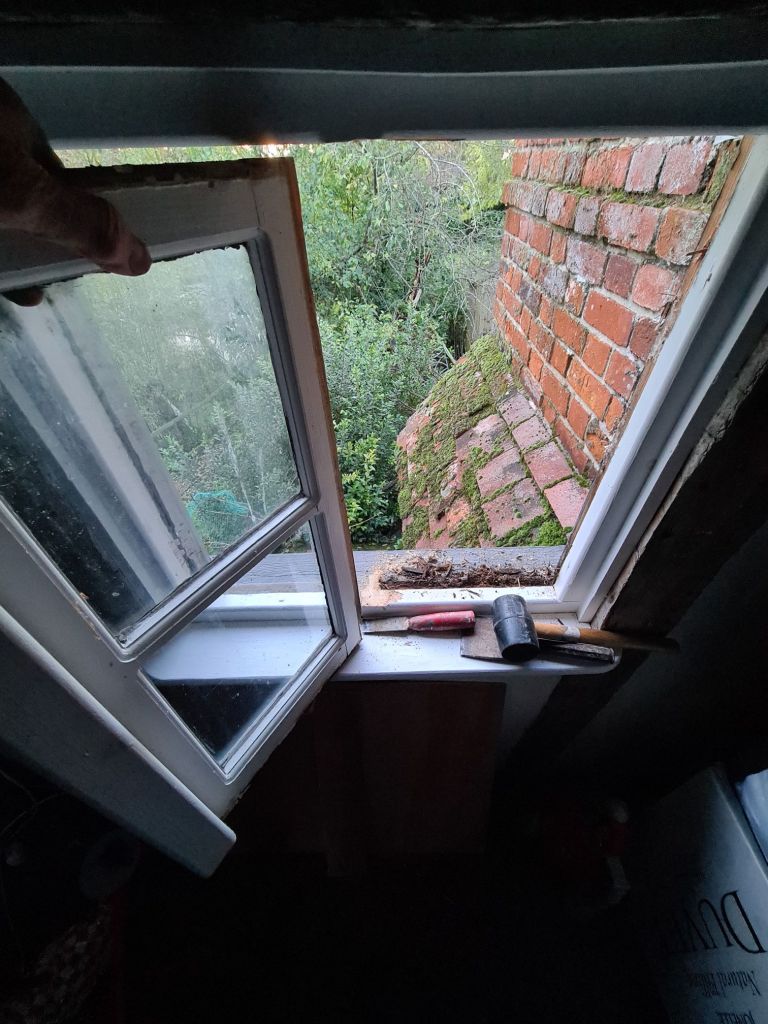
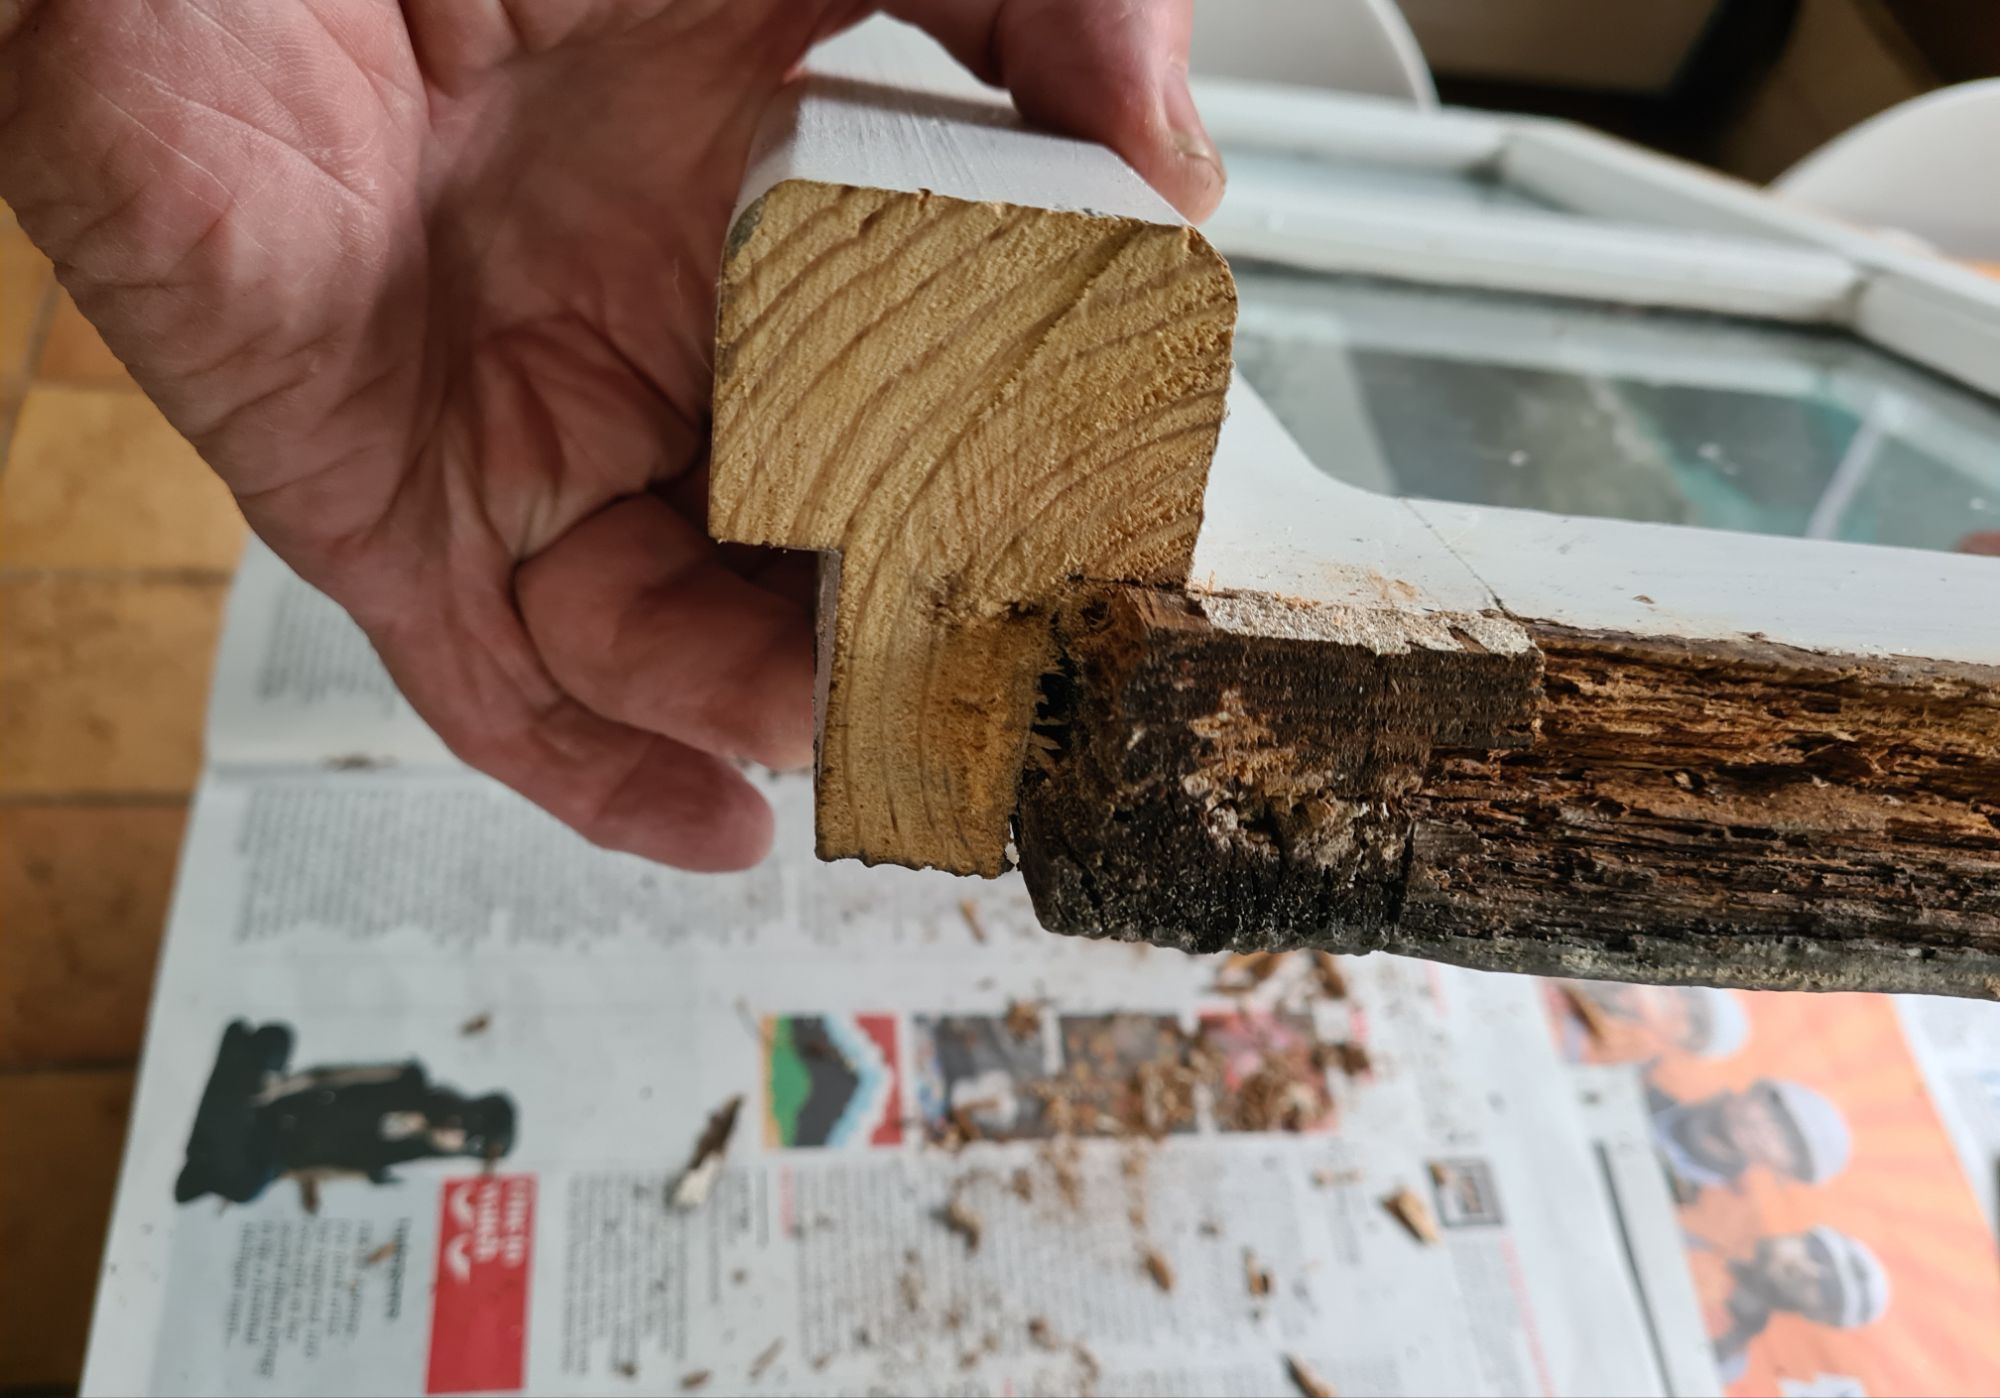
Taking out the old window, which luckily was lightly nailed. We feared it might break and have to be completely remade, but it was intact.The saw cut and thebottom of the window, which was rotten. The rot was cut out and a new piece glued in.The window was a tight fit and had to be shaved to fit back with hinges The refitted opening window. The weather was breaking so finishing work– painting and a final trim – have been left for a dry spring day.
With the housepecker feeding on the building (see previous post), we were reminded to check the walls for surface cracks and any exposed clay daub beneath. The birds love digging into a soft clay surface to find insects.
Chalk-lime plaster from Anglia Lime is excellent for these quick repairs. It works almost like putting stitches or sticky tape over a crack. When cured, the fibres give a thin layer of plaster a lot of strength. You can see this by picking up a dried spill: it will bend like a piece of leather and be resistant to tearing.
When the plaster is dry, it will be touched up with limewash
This is very helpful on an old clay daub wall, which is always prone to non-structural surface cracking, as the clay underneath the wall’s footings dries in summer and wets in winter. These surface cracks are not serious, but if left can quickly spread, letting water, insects and eventually woodpeckers get at the soft clay underneath.
Our walls are a messy mixture of surfaces accumulated over centuries. We agreed early on with the conservation officer that we’d patch repair as much as possible to preserve the old clay, a piecemeal approach which is probably what the farmers have always done. A full surface strip and replastering loses a lot of old material.
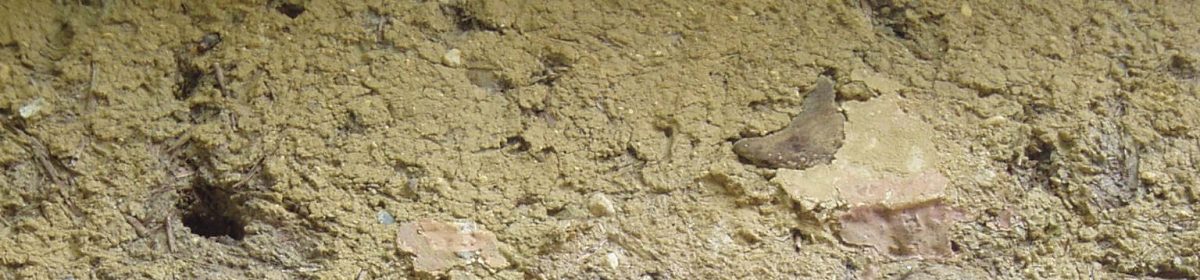
The clay daub seems to have been preserved originally with many layers of limewash straight onto the daub, creating a thick crust like a plaster, which is still there in some places. In more recent years – which could mean back into the 19th century – thin patches of cement have been slapped on to cover damaged clay surfaces, sometimes with broken brick shoved underneath to fill holes in the clay daub.
When we arrived, the first thing we did to the outside was to use new clay daub and a lime and sand render on a dozen areas where old coatings had fallen off, the clay was exposed and woodpeckers had dug deep holes (I’m afraid I do go on about them sometimes, lovely as they are). After some good expert advice, we later switched to a chalk-lime plaster instead of a render, which is much better.
The stitch repairs are not meant to be permanent, and eventually more substantial work will be needed. In fact, we expected these quick and simple repairs to last a few months to give a breathing space while we found time to do the bigger jobs. But in the 5 or 6 years since we started routinely catching cracks in the surface early and plastering over them with the chalk-lime mix, we haven’t had a single large surface failure. In the previous couple of years, several quite large chunks of old render had fallen off.
It sounds like a bodge, and it is, but it’s in the spirit of patching, make do and mend that has kept the walls together for so long.
Of course, when there is a serious deterioration of the wall, for example when some old cement render drops off and pulls clay with it, then there is no alternative to a full repair. We will use new clay daub to fill cavities and then plaster to protect the surface.
Thin layers of ready-mixed chalk lime from Anglia Lime were plastered over the cracking and a few inches either side. You can use a trowel or – if you don’t mind mess – apply and smooth the plaster with your fingers, wearing PVC gauntlets. That works better than it sounds, because it pushes the plaster into the cracks. PVC gloves are also good for smoothing. In either case, a large bucket of water is needed nearby for regular rinsing of tools and gloves.
Our method works, but the result is not pretty – I remember the appalled expression on the face of a professional plasterer when he saw our walls!
We kept hearing the ‘tap, tap, tap’ of a woodpecker on the end gables of the house. By the time we walked round to look, all we heard each time was a rush of wings and a distant woodpecker disappearing over the other end of the garden.
It was so fast and blurred it was hard to tell whether it was the green or the greater-spotted woodpecker. Both are seen regularly in our garden, and we think we’ve also had lesser spotted around. The green woodpecker usually feeds on the ground, rather than clingjng to walls.
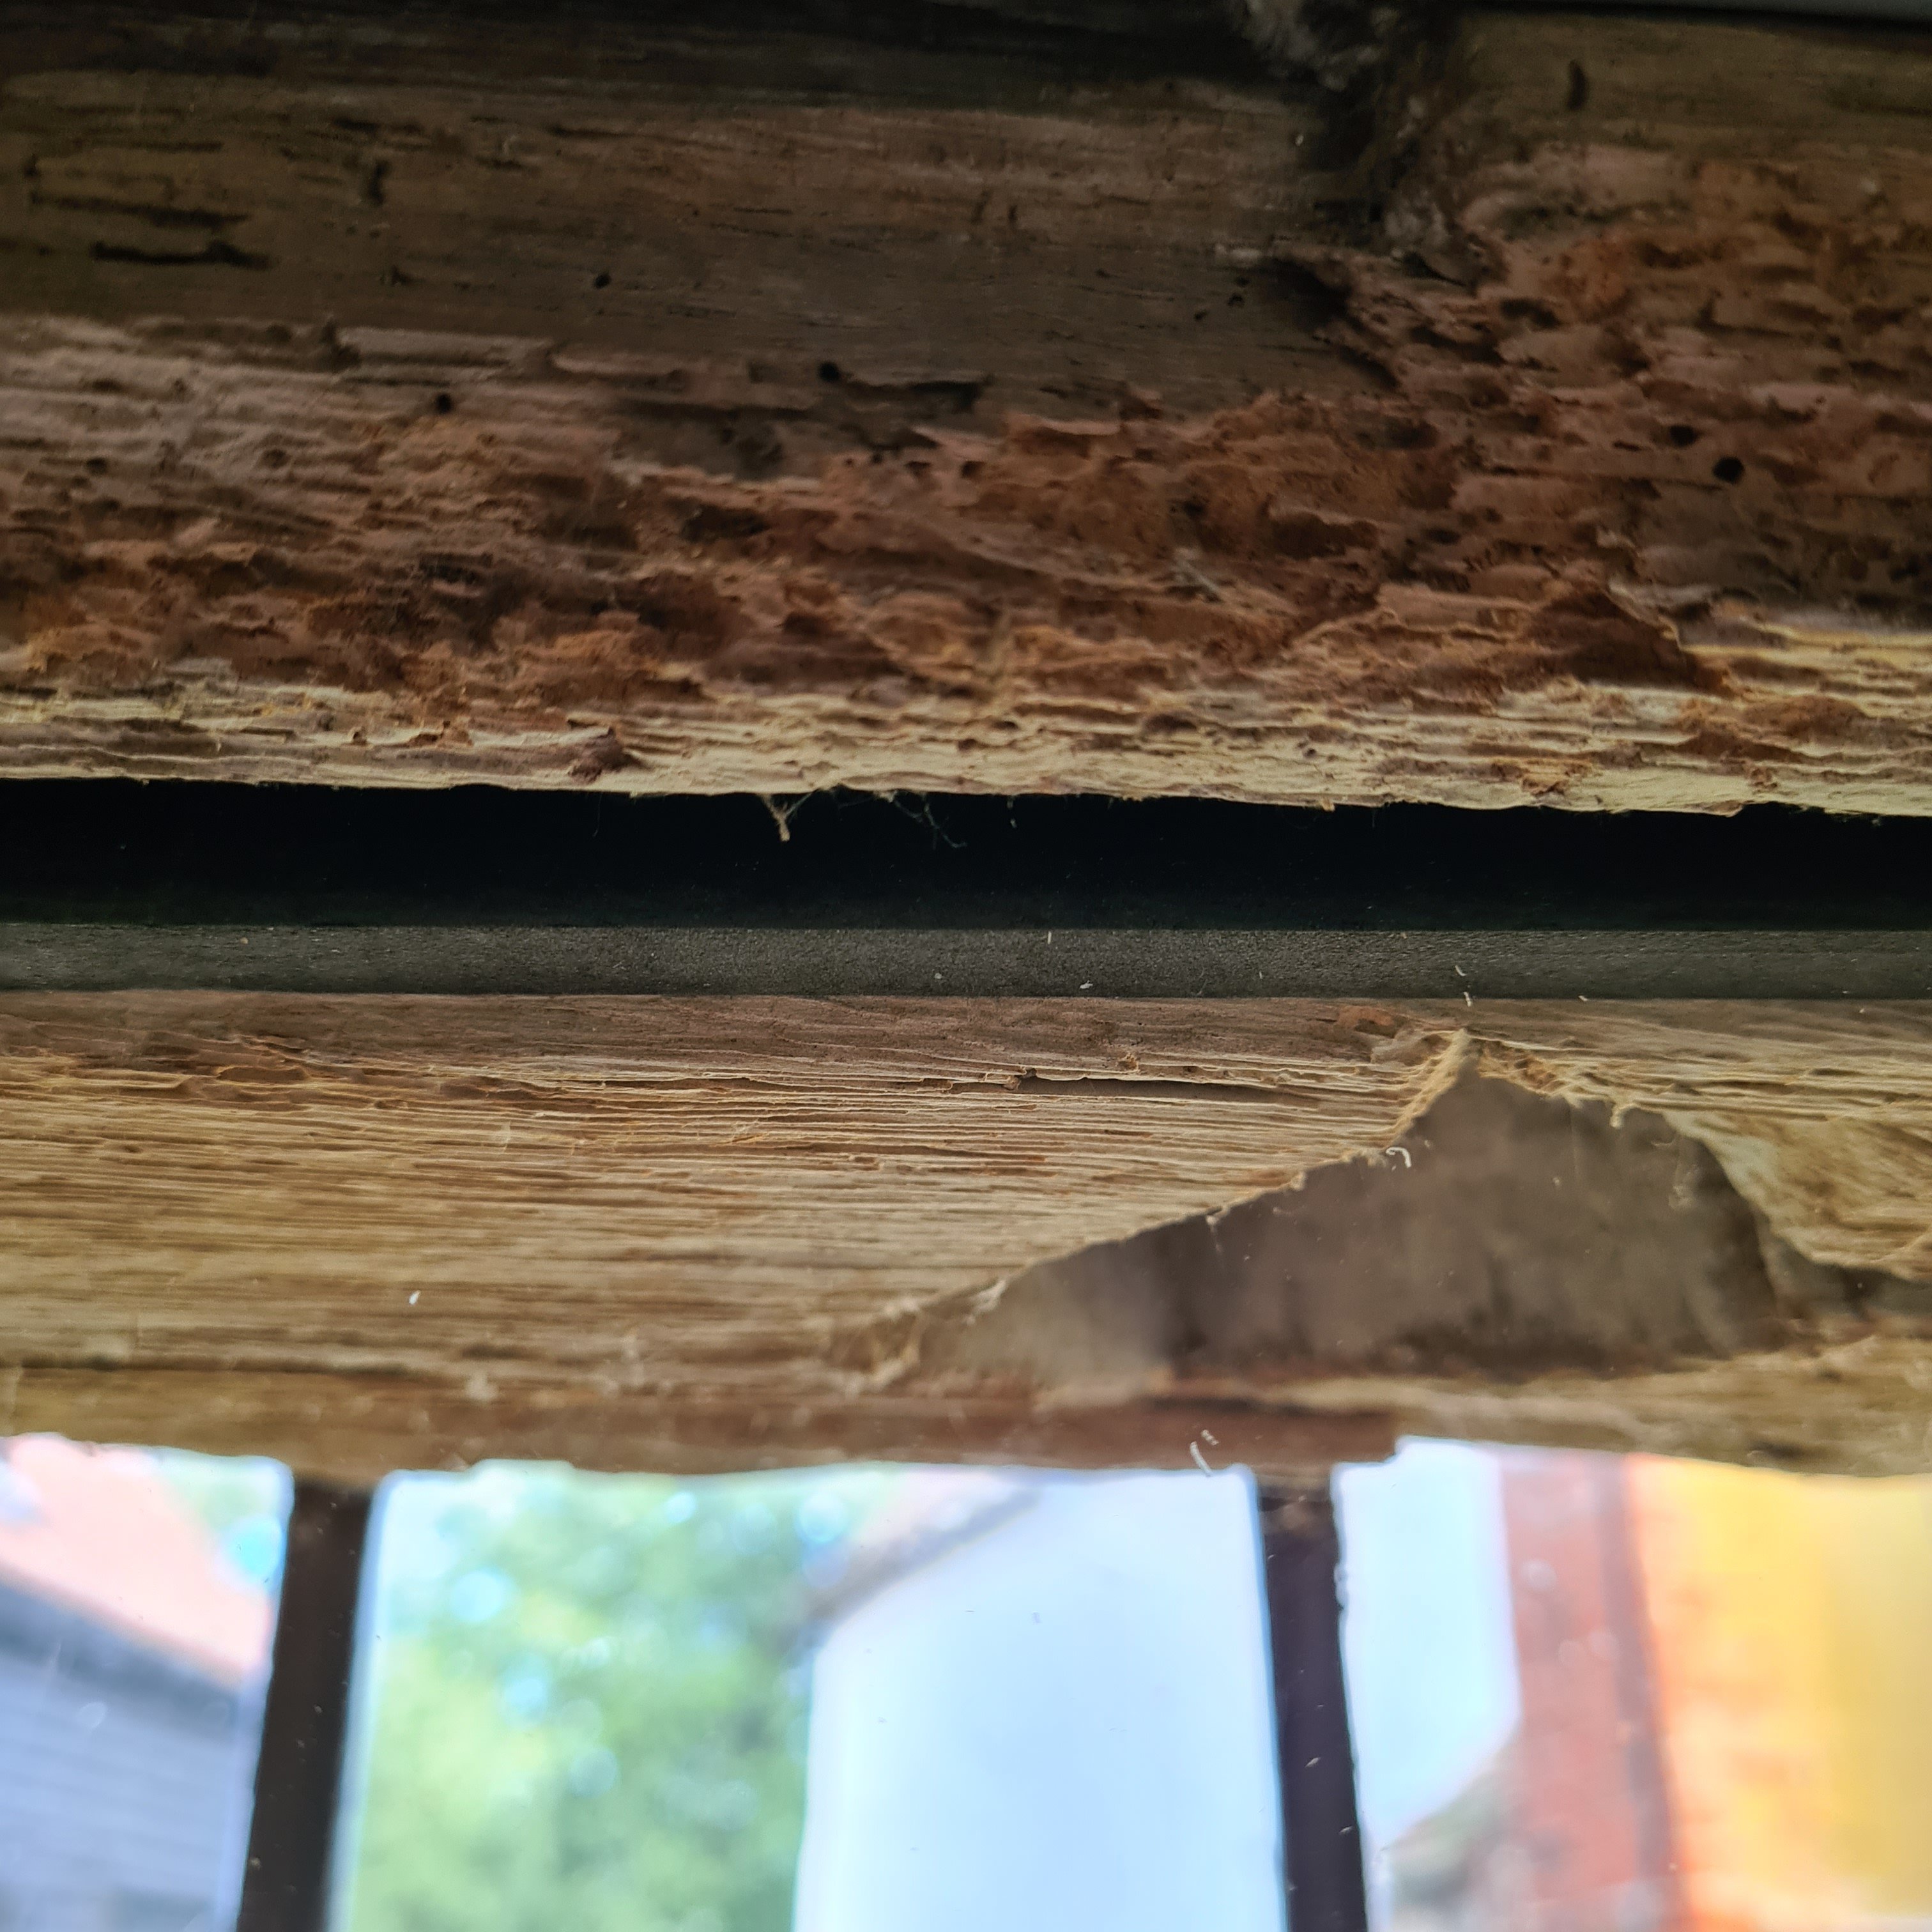
The evidence of what the bird was up to was visible in marks on the barge boards and soffits, where the woodpecker must have detected rotten wood and boring insects.
When I get my camera out fast enough one day, I’ll replace this stock photo with one of our visitor.
Today when I arrived round at the wall, the bird was still there, undisturbed by my approach, but I could not see it. The noise continued louder than ever, as if it were amplified.
And so it was: the woodpecker had broken through into the loft, found more old wood to attack, and the noise was amplified in the loft space like a sounding board. Because it was now inside the house, the bird had not sensed me coming.
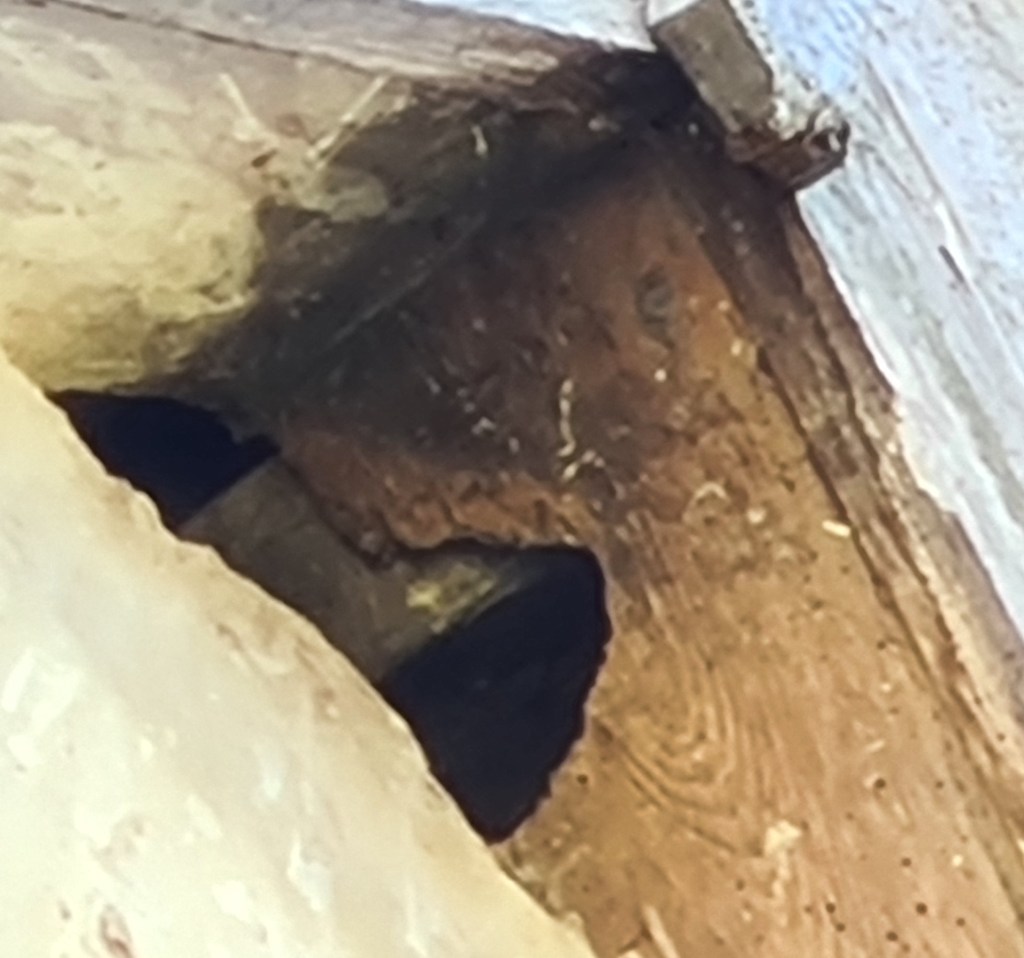
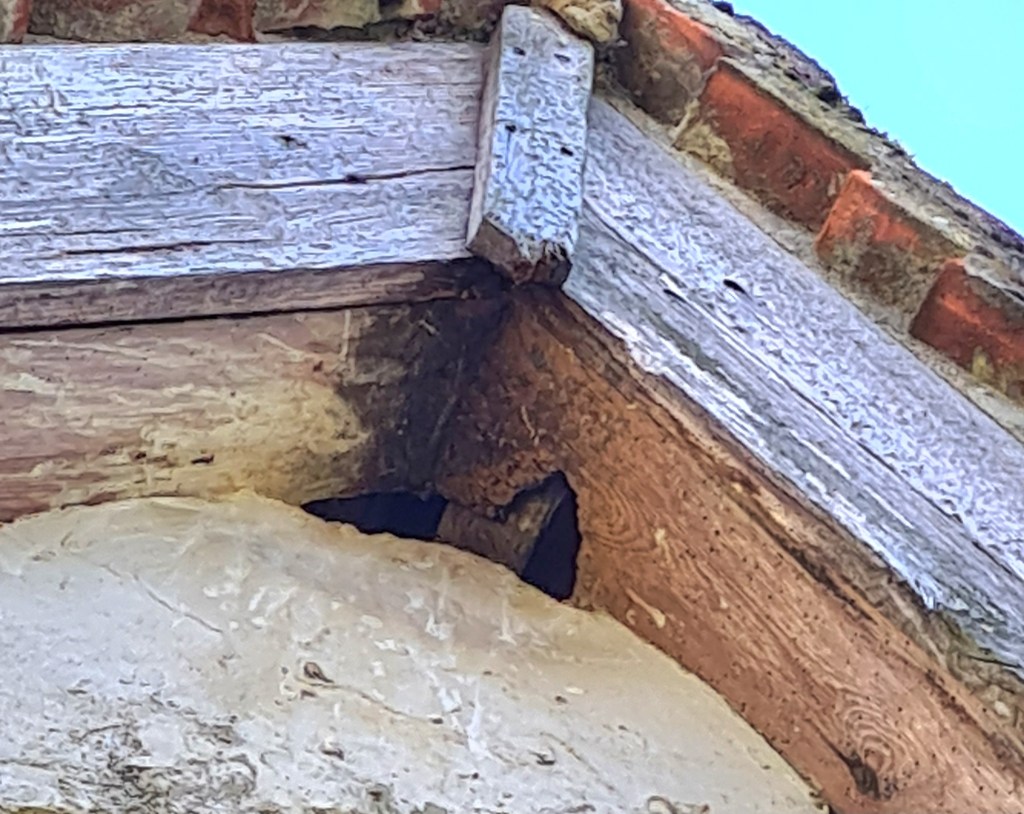
I watched and listened for a couple of minutes before a (greater, I think) spotted woodpecker emerged rapidly and whirred off. The hole it made is in a soffit, where the two barge boards,and the soffits underneath them, meet at the peak of the gable.
Woodpecker hole in the soffit
There was a tiny hole there before through which only bats could pass. We know that because we once found a dead pipistrelle that had fallen through a crack in a bedroom ceiling (now filled). But the hole is now far bigger, easily enough for squirrels to get inside and rampage round the contents of the loft.
Right at the peak of the gable
What the woodpecker is so keen on inside we don’t yet know, but with plenty of old wood there is no doubt a large population of insects to feast on.We are going to have to stop it.
Previous woodpecker attacks have always been on our old walls, which they dig into searching for insects wherever the clay daub is exposed. We have to do regular repairs to the surface stop those attacks, because woodpeckers are only interested in soft places where plaster and limewash coatings have dropped off.
A proper repair to the soffit will need scaffolding, which will be a lot of money. That whole gable is anyway due for repairs in a few years, and it would be better to do both jobs at the same time to avoid paying twice for scaffolding.
We’ll instead empty that end of the loft of long term storage so we can get to the gable, and block up the hole from inside, possibly by nailing some spare lead sheet over it. That means carrying some old boarding to the loft to lay as I move along, because there’s no floor near that gable end.
I’m not looking forward to it – the job is about as enticing as unblocking a sink, my other pet hate, so it will not be at the top of my priority list. But it must be done.
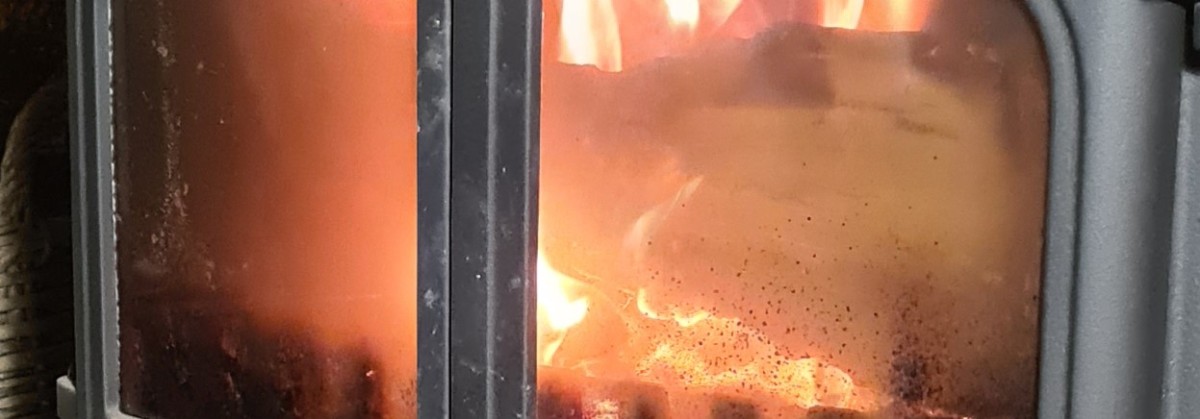
George Monbiot, an influential writer on enviroment and climate, made a grovelling apology in the Guardian not long ago. It wasn’t for any mistake in the paper, but for having personally owned three wood-burning stoves for the last 14 years, which he’d decided was a terrible error. Not only do they produce large amounts of carbon dioxide, they also spew out dangerously polluting particles.
So while I’ve been chopping wood for the winter, I’ve been worrying about our woodburning stove, which we installed in 2009. Are we poisoning ourselves and others, and damaging the planet into the bargain?
Our Morso wood burning stove
Now you could say that with 3 stoves for 14 years Monbiot has had 42 warm stove years against our modest 14 since 2009. He’s pulling up the ladder behind him, so we don’t need to feel bad about it. It will be another 28 years before we’ve done as much damage as him.
You could also look back 15 to 20 years and find a lot of climate conscious people promoting the idea that wood is a good source of heat because it is renewable. Those who have had wood burners for a long time installed them in good faith, and are entitled to feel a bit aggrieved when the advice reverses (just like the advice to buy diesel cars for the sake of the planet, which was also suddenly reversed).
Enthusiasm for wood burning led to some serious mistakes, both in the installation of thousands of wood chip boilers in the home and also in government policy: converting the huge Drax coal power station to wood burning has turned out the opposite of a climate friendly policy.
Monbiot’s case against wood-burning stoves is that though they are owned by only 7 or 8 per cent of Britons they create more dangerous pollution than all the cars on the road, and carbon dioxide emissions from stoves are contributing to the climate crisis.
Much of the wood burned is said to come from unsustainable sources and sometimes from trees that are unnecessarily felled for profit. The time had come to own up after years of keeping his ownership quiet, Monbiot said, in what read as an overwhelming rush of guilt.
What are we going to do? Nothing. Here’s why:
The house is built from timber and clay and has never been heated by anything other than burning wood. We decided when we repaired it to stick with the original heating, replacing an open fire by putting the most powerful domestic wood burner we could find into the large brick fireplace. (At some earlier stage the building had also been a brewhouse with a central hearth).
This was a much better solution than the usual plan with houses off the gas grid, of installing an oil or gas tank outside and a full wet central heating system. That would dry out the whole building, in a way which we suspected could be potentially damaging.
We did not want to give up entirely on modern standards of heating so the compromise was to install individual electric radiators. Other than the wood burner we are entirely electric, but the wood burner allowed us to keep the electricity bills well down until the 2022 fuel crisis.
We have now decided to switch the emphasis more towards off-peak storage heaters to take advantage of the much increased differential between night and day rates. We have just added two really big ones. We also signed years ago with an electricity supplier that has most of its contracts with renewables – wind, solar and nuclear.
By avoiding direct burning of oil or gas and focusing on the combination of electricity and wood burning I think we’ve found a better solution than ditching our wood burner in guilty panic like Monbiot.
What about the health risks? We are in a small hamlet of a few houses surrounded by fields, so it’s not like a wood stove in town sending clouds of particles over nearby streets. There are miles of largely open country in which it can disperse.
And the risks to our health? We use dry hardwood, which produces very little smoke. It’s definitely not harvested unnecessairily – we have had a lot of dead and dying ash in the garden, and it is 11 years since we have had to buy firewood. We have planted more new trees than we have had to fell.
Good ventilation is an absolute necessity for wood burning and a closed stove produces far fewer pollutants than an open fire. Care has to be taken not to inhale fumes when lighting and refuelling but otherwise we are minimising the risks as much as we can. Also, the stove is usually lit only in the evenings in winter, and the heat in the fireplace bricks stores warmth that lasts well after the fire has gone out around midnight.
So put it this way: I don’t think we’ll ever get to the point of doing as much damage as Monbiot has with his three woodburners.
Energy prices have finally pushed us into doing something we’ve talked about for years – installing removable secondary glazing on the windows. In our case, this is worthwhile for draft proofing as much as for improved thermal efficiency, because we have 7 leaded windows, which are leaky, and impossible to seal any other way.
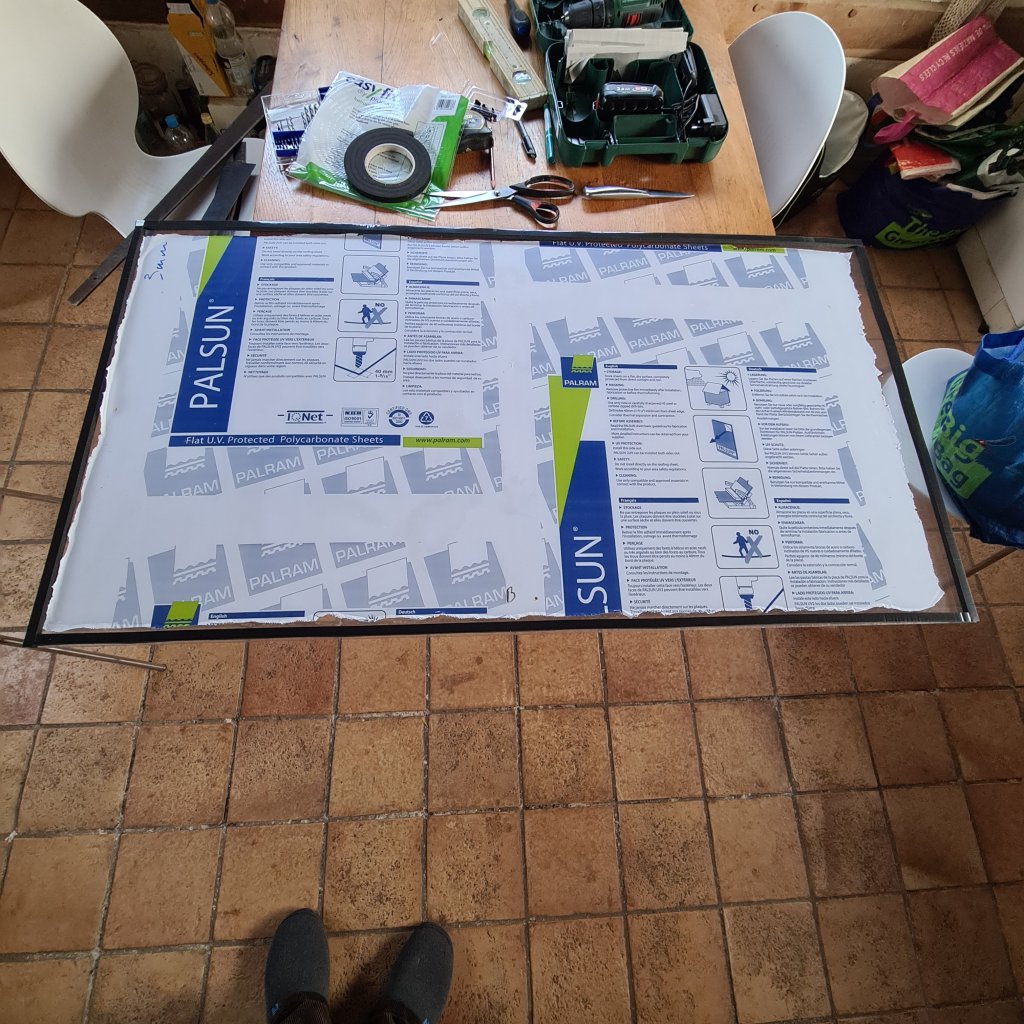
Secondary glazing needs to be light, easy to carry and hard to break, making it safer if we want to take it off for storage in spring and reinstall in the autumn. It turned out to be quite simple to do, using sheets of solid polycarbonate cut to size by the supplier.
The polycarbonate sheet is hard to see on this mullion window
The great advantage of polycarbonate in a crooked old house is that it’s far easier to drill and cut to shape than glass. In our case, that required several curved cuts to fit against ancient oak posts and beams, which I’d hate to try with glass.
Polycarbonate is also half the weight of glass, just as transparent, and very tough indeed. The disadvantage compared with glass is that it is easily scratched by rough handling or careless cleaning if you don’t follow guidelines. But those problem are far outweighed in our case by the advantages.
There is another choice, clear acrylic. This is similar to polycarbonate, which was not far short of twice the price, at just under £50/square metre against around £26 for acrylic.
Polycarbonate is much the strongest. It’s a bit less easy to cut and drill, but its UV resistance and much greater strength – needed for regular removal and reinstallation – made it worth spending more.
At first, we thought we’d need to build wood frames to support the polycarbonate. We bought a 3mm thick sheet for one window as a trial, and it was clear immediately that the polycarbonate was stiff enough to mount without a frame.
Thought needs to be given to how to fix the sheets and that will vary with preference and type of window.
Nine windows in the old part of our house are old and irregular, eight of them with oak mullions, one of which is already well insulated.
Polycarbonate on a 19th century window
After playing around with the trial sheet, much the easiest solution was simply to screw it to the window frame, accepting that the small holes would be visible when the glazing is removed. This worked with both the mullion and the more modern windows.
A complication is that it is advised not to drill holes less than 40mm from the edges of the sheets, or it could produce cracks. So where the window layout does not allow a good overlap of the sheet with the frame, another method is needed. The simplest is to hold the polycarbonate against the foam with removable battens.
This short piece of wood was enough to hold one side firmly against the draught-proofing foam
Given the sheets’ stiffness, the battens do not need to be continuous all the way round. A few short ones or small, swivelling toggles would do the trick, depending on the exact design of the window. Others may come up with different solutions.
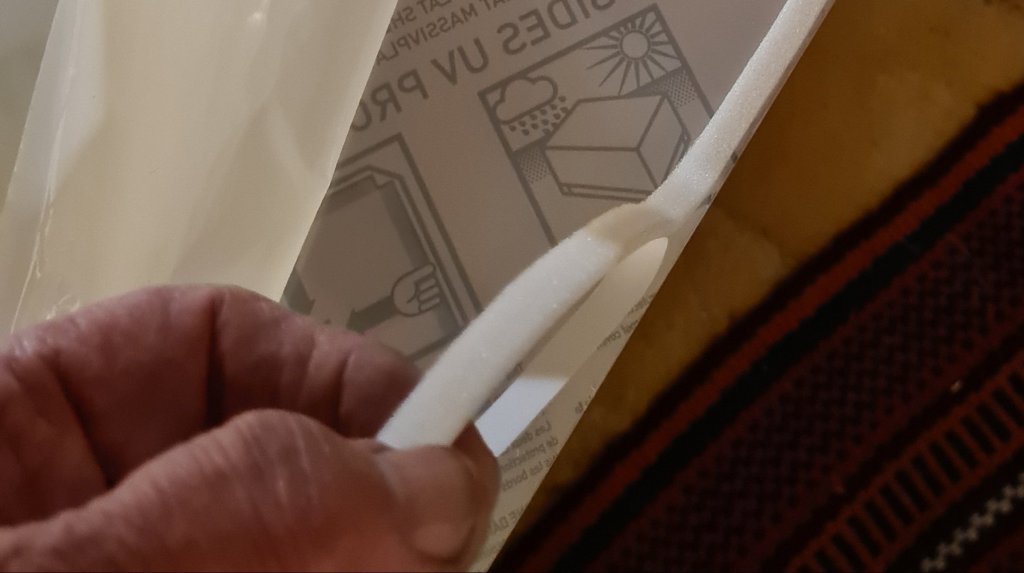
Next question is how to make a seal between smooth plastic and the frame. Our solution was ordinary foam draftproofing strips with adhesive backs, stuck all the way round the edges of the sheets.
Applying draught excluder to the edge of the sheet. While working, leave most of the protective film on the polycarbonate sheet till the last minute, peeling back just near the edge to applythedraught excluder.
For the Victorian and more recent windows, where the timber surface of the frames is flat, white 5mm foam was enough. For the irregular oak timbers framing the mullion and other windows, we used brown 10 mm draftproofing strips.
The technical advice sheets say use new and very sharp drill bits for the holes to avoid cracking or overheating.
Tighten the screws evenly, each one a little at a time, as you go round the perimeter, several times. Tighten as little as possible, or the polycarbonate will distort. They need to be just tight enough for the foam to make contact all round.
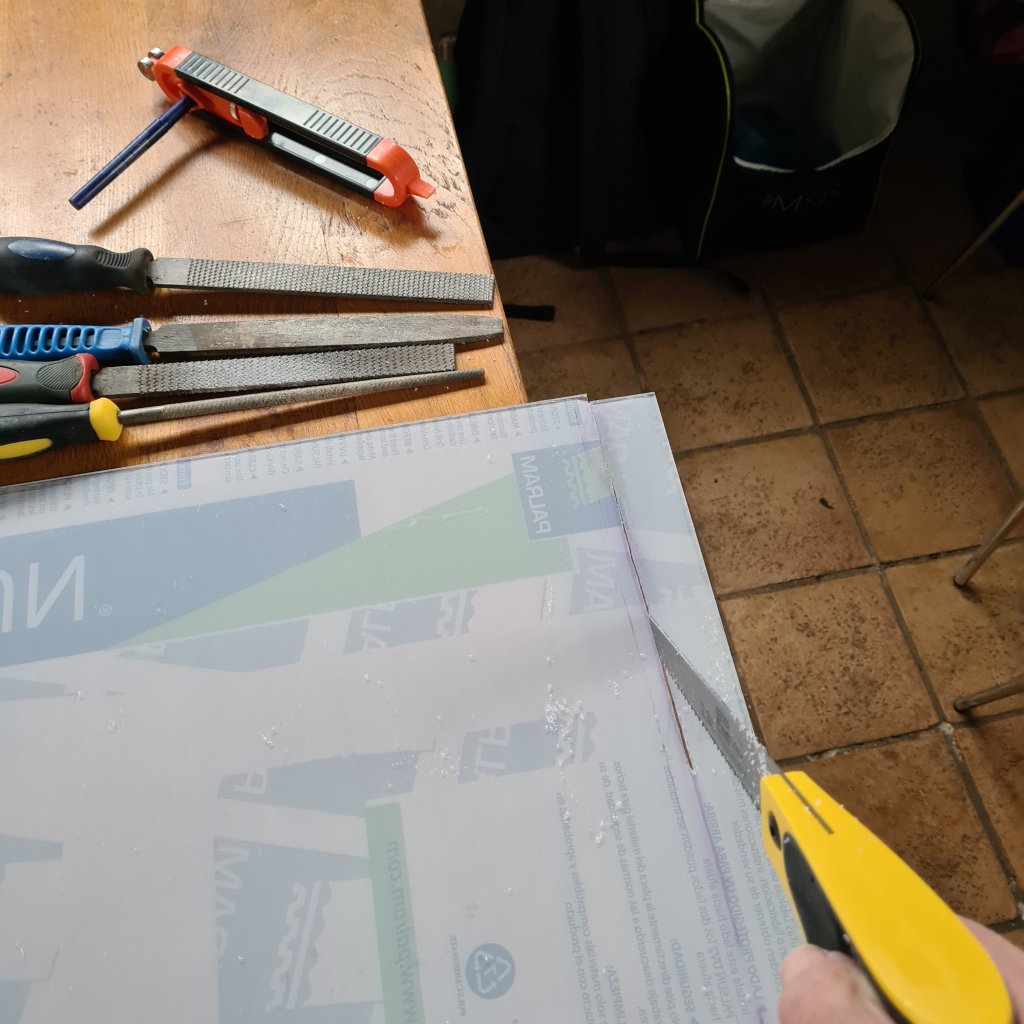
Using a fine saw to trim the sheet, leaving in place the protective film on both sides. A scribing tool was needed on this sheet to mark a gentle curve.
Some trimming of the sheets may be needed if the window frames are not square; if done with a power jigsaw, then a specialist blade for plastic is required, to avoid melting the material. In fact, it was easier to use a new, sharp handsaw, as we did not have much cutting to do.
This saw cut shallow curves quite well…..and this very fine-toothed saw worked well for straight cuts.
Fine adjustment of the shape of the perimeter can be done with a sharp flat file, though make sure the sheet of polycarbonate rests on a clean, flat surface while you do it.
The sheet comes with a plastic protective film on both sides, to peel off just before final installation – it is important to leave it on as long as possible. The type we bought has ultra violet protection on one side, and that should face outwards. The correct side is marked on the film. Some later sheets had UV protection on both sides.
Sheet with protective film still in place, ready to screw to window frame. Here black draught excluder has been applied all round the edge.
Because polycarbonate is stiff, we found 6 x20mm screws at around 250mm to 300mm centres were an adequate size on windows where the sheet rested on the window sill and 5mm foam was used.
Where the sheet used 10mm foam (on rougher oak surfaces), and had no support from below, we used 8x25mm screws. We used zinc-plated steel screws on white-painted windows, and round-headed black japanned where we screwed into dark oak timbers.
An old oak window with polycarbonate fittedusing black draught excluder. (Three mullions are missing from this window).
The cost averaged at around £60 a window, including a modest amount for draughtproofer and screws. Our supplier, which delivered accurately cut sheets on time, was https://www.thepolycarbonatestore.co.uk
Be very careful cleaning polycarbonate, because it scratches easily, even though it is hard to break. I made a mistake on one window, cleaning it with an ordinary wet cloth and not noticing grit had fallen from the limewash wall above. I found tiny scratches, luckily much less obvious than the distortions and scratches on the old Victorian glass of the window behind. Your supplier should have advice sheets on cleaning: stick to what they say. Some everyday cleaning products and cloths can damage polycarbonate and it should not be wiped and dusted with dry cloths.
Apart from the sill, none of the sides of this window are straight, so trimming was needed.Detail – the sheet and foam fitted neatly upwards into the slot in the beam above this mullion window, along which the old wooden shutters used to slide. We have one complete workingexample of a traditional shutter, so that window does not need polycarbonate.
We had planned to remove the polycarbonate each spring and reinstall in autumn but, on reflection, there’s not much point on the mullion windows as they cannot be opened. So these will only come off for cleaning. Polycarbonate on opening windows will go in the garage for summer storage.
Keep any cardboard sheets the polycarbonate is packed in. It will be useful to protect them during summer storage. I also kept some of the protective film, in case any sheets turned out to need more work.
And finally,there is a great deal of information on line about secondary and double glazing. For modern double glazing, optimum air gaps are no more than 20mm, beyond which convection begins to remove some of the benefits.
For a complicated listed building like ours, secondary glazing can only be fitted in practice with much larger air gaps, of 50 to 150mm, so thermal performance cannot be anything like as good (though noise insulation is improved, if that is what you need – but we don’t).
I can’t quantify the heat performance of our secondary glazing, and anyway it would not tell us much if we knew.
That’s because an unquantifiable part of the heat loss is through the leakiness of our old windows, especially our 7 leaded windows, which have draughts around many of the small panes, and I cannot see any other simple way of stopping that.
All I can say is that there was an immediate improvement in thermal comfort once secondary glazing was installed, from a combination of reduced draughts and improvement in thermal efficiency.
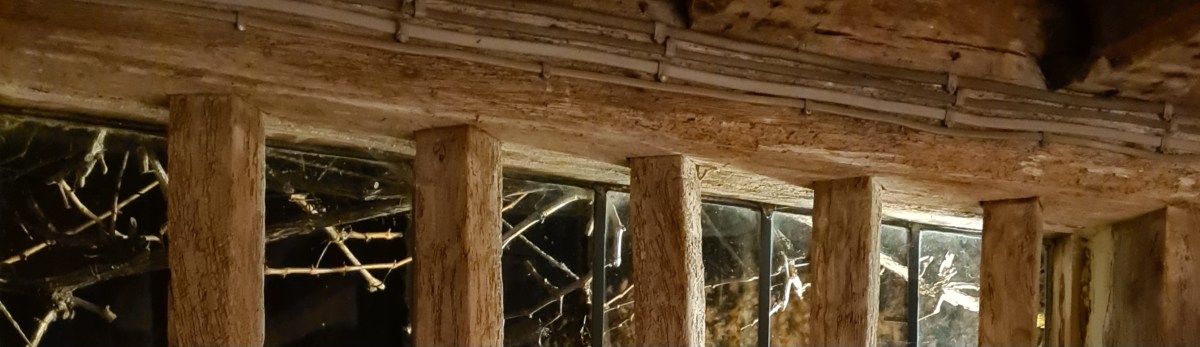
PS One way to judge which windows in an old house are leakiest is to see how many spiders webs are on and around them. Where there are draughts, spiders put webs, because draughts help them catch prey more effectively. Till installing the secondary glazing, our leaded windows have had to be cleared of webs every couple of weeks. Spiders are ineradicable from a 16th century house, though thankfully ours are mostly the tiny bodied, long-legged but innocuous looking Daddy Longlegs.
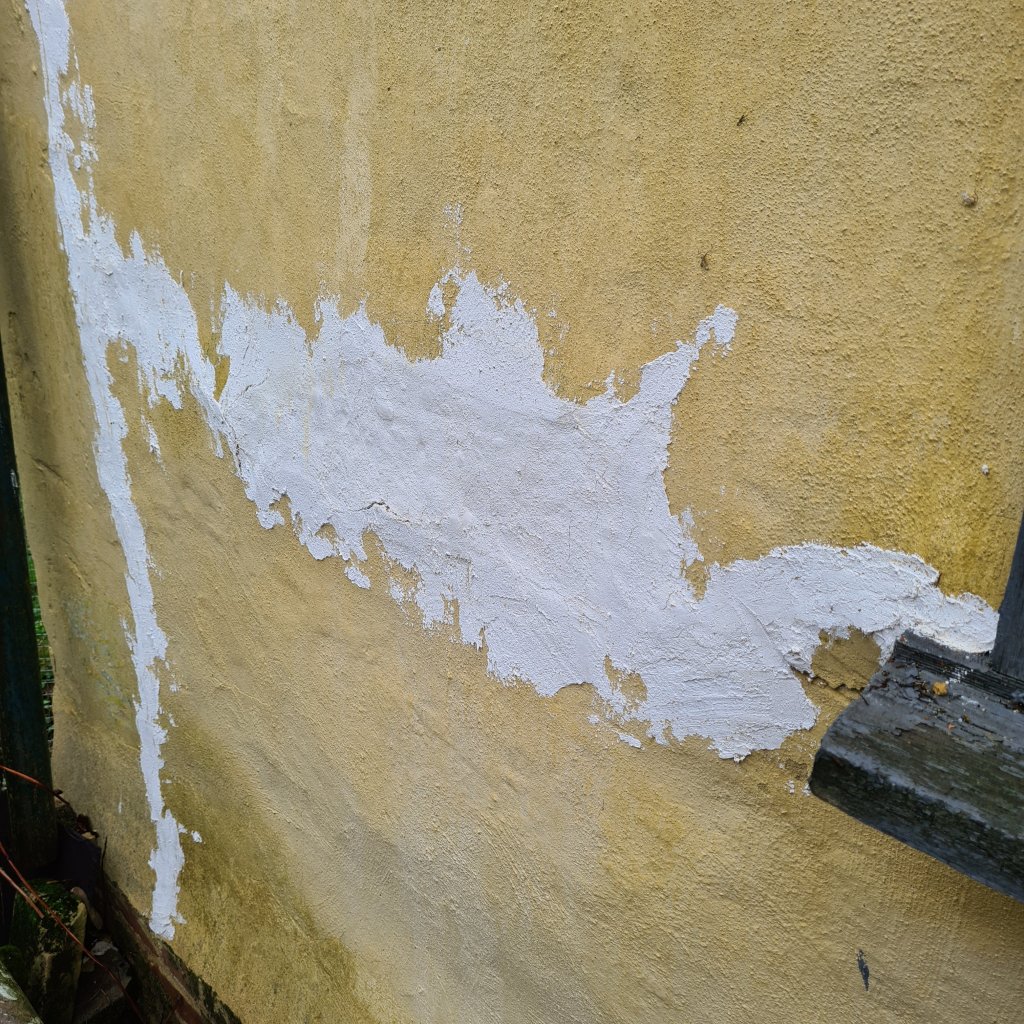
I’ve just done a few pre-winter repairs of the outside walls in spots where surface render has lost its grip on the clay daub beneath. To my surprise, chalk lime plaster bought in 2014 is still usable.
It appeared to have solidified under an inch or so of water. But after scraping at the surface it quite quickly began to recover its original consistency. Lime putty when stored properly lasts many years – I still have an old tub of it in good condition – and this plaster is simply putty, chalk and fibre.
It is not entirely traditional: it uses synthetic fibres and they last indefinitely in the tub, unlike haired plaster, where the hair begins to disintegrate after a month or two.
Chalk-lime plaster – quick repair ahead of the winter
The old plaster is not ideal, because it takes hard work with a trowel to get back to the right consistency. But having forgotten to order a new tub, it’s good enough to protect small areas of exposed clay from rain and woodpeckers for a while. Next, I must order a new tub.
Chalk-lime plaster used externally has proved extremely effective over the years in temporarily patching areas of old wall that we haven’t fully repaired yet. A thin layer behaves almost like a sticking plaster over the cracks where old render is beginning to come away from the wall. Once cured, it has considerable strength and resists tearing.
There’s one quite large patch where the old render has almost entirely lost its grip on the clay – tapping reveals a hollow behind – but plaster over the cracks has kept it in place for the last few years.
It’s admittedly a bodge, but we wanted to delay full repairs as long as possible while effort and money went into other priorities. In due course the whole of one gable and about half of one wall still await a full overhaul.
Both will be a challenge. In the days when our house was part of a farm, a lot of running repairs on the clay were done with cement render. A bit less than a third of the walls is still cement render. The rest is our past repairs and some areas of wall that have been untouched for many years.
The latter are not even rendered, but are clay daub covered with many coats of limewash over a long period. The limewash has built into a thick layer that, until we examined it closely, we thought was in fact a render. So our farm building’s exterior walls may once have been rough clay daub given a protective limewash.
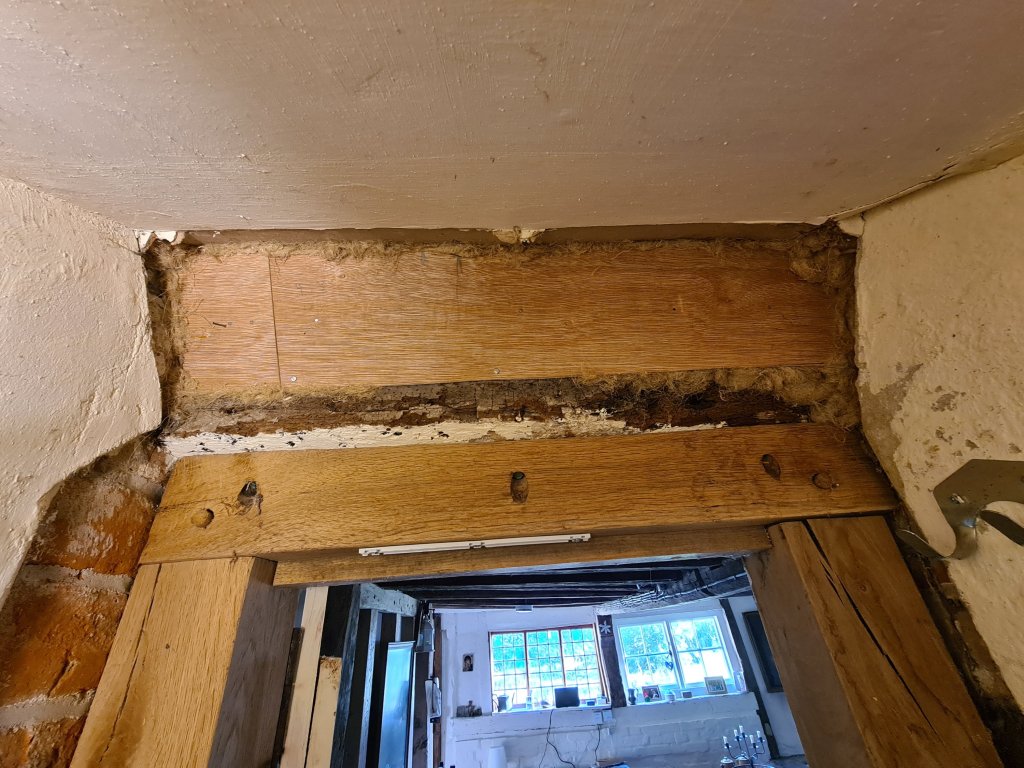
We are still finding out new things about the Old Brewhouse, most recently from a blast of freezing air that suddenly started coming out with unusual ferocity from the gaps round a fireplace cupboard door. Inside the cupboard, bits of plaster had fallen and a gap above the inside of the door had got bigger.
I anxiously thought – wind damage: what’s blown loose? But closer inspection showed that the wind was blowing down a narrow gap between the structure of the big brick fireplace, with its bread oven and chimney, and the clay daub wall of the house.
We’ve always made a virtue of doing projects slowly, which gives plenty of time to think through what we want. A dozen years is perhaps pushing it a bit – that’s the time between planning permission and commissioning builders for a garage, which was finished in the early summer.
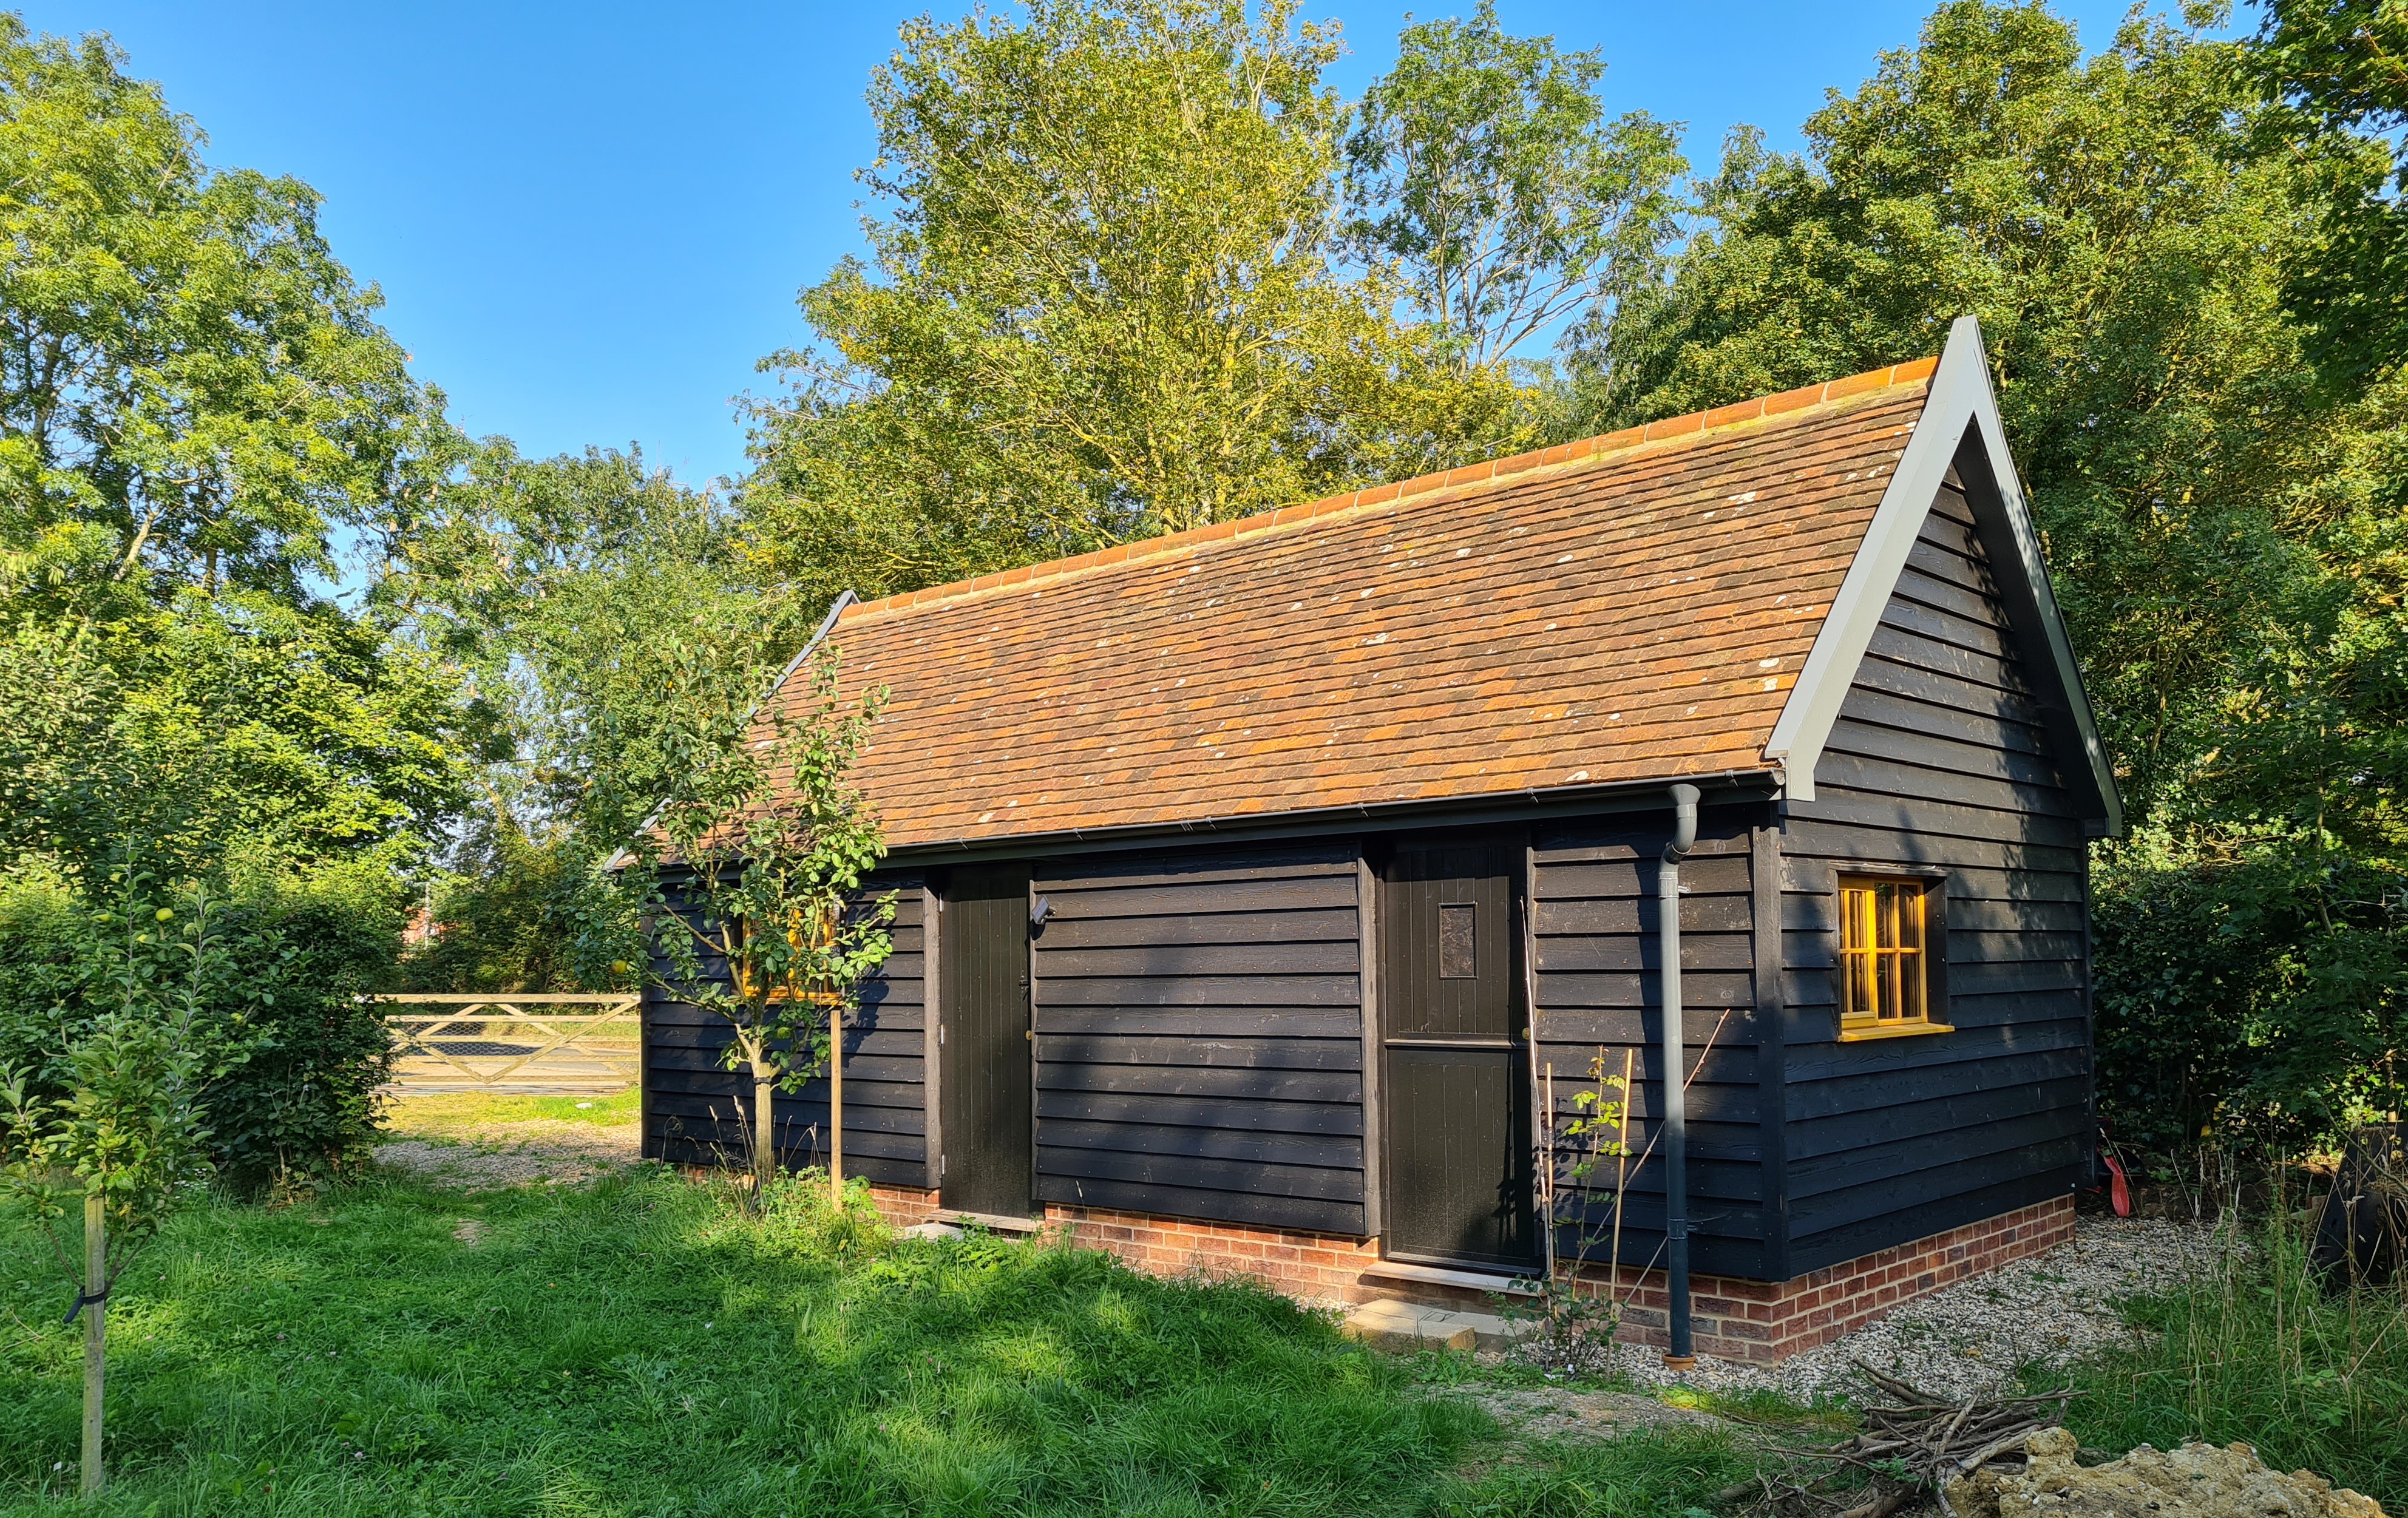
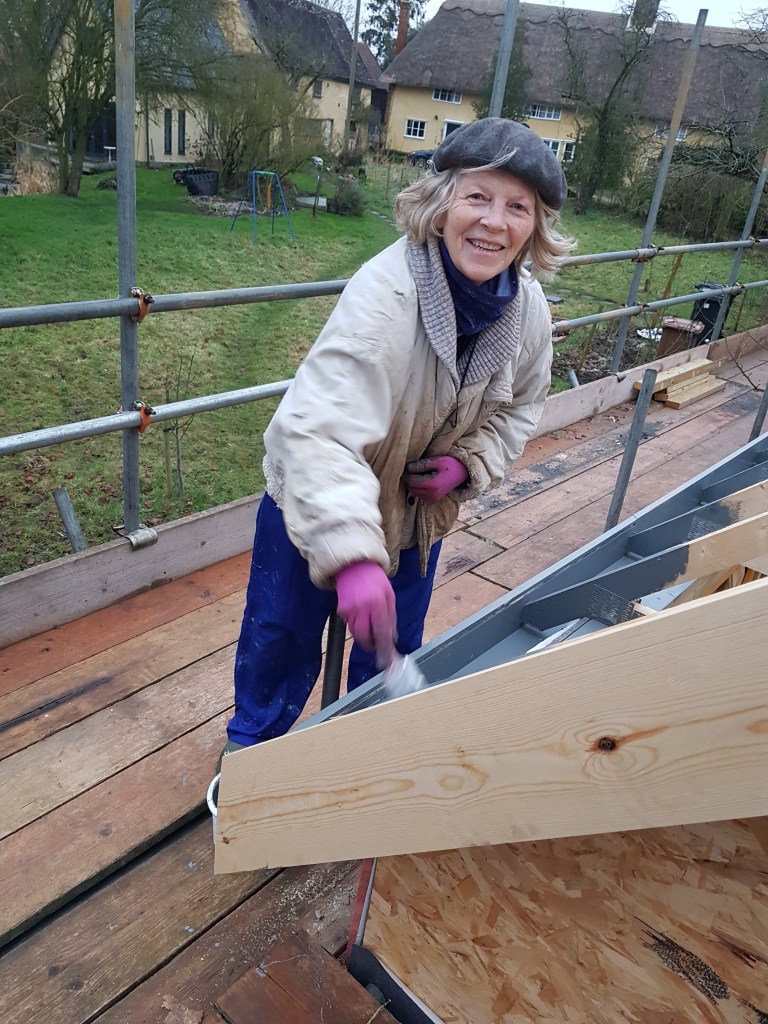
Last year, we applied to the planners again to change the garage design and shrink it a bit, to make it more practical and less dominant in the garden. Another motive was to make it look more in harmony with the old barns scattered around the site of the former Rush Green Farm. We have added a storage room, 2 side doors and 2 windows plus loft space for more storage. Once again – three times lucky, in fact – we found an excellent firm of local Suffolk builders.
The builders ran the job, but we helped with finishing work. Chris on the scaffolding painting.
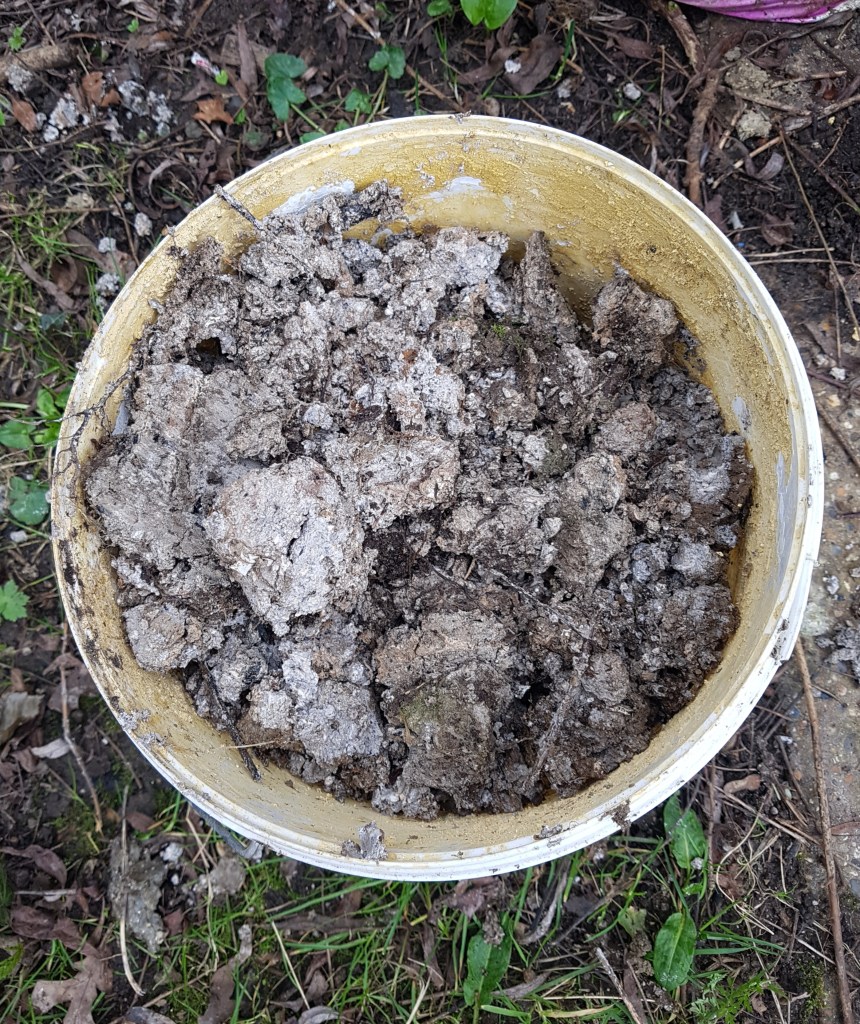
This unprepossessing grey mess I collected in a bucket is boulder clay. If you’ve got a house with clay walls, it’s like finding a seam of valuable minerals. There’s no clay to beat it.
Our part of Suffolk mostly sits on thick layers of the pale grey, white-flecked natural building material, laid down by glaciers grinding their way over chalk. But it’s usually deep down and hard to find.
It comes near the surface here, because that’s why our pond exists, sitting on an impermeable bed of clay. But it’s not so easy to dig out without draining the pond, which we think was once a clay pit.
Digging a trench to plant a hedge yesterday I kept finding lumps of it, deposited there after earlier work on the pond. It has got muddy, but that doesn’t matter – a bit of earth won’t spoil its performance.
Not only does it make a good, plastic clay for wall repairs when mixed with straw, it is also less prone to shrinkage cracks than ordinary yellow clay, and dries as hard as a lump of chalk.
If you have clay daub walls and come across any, store it till you need it. Wonderful stuff.
We’ve at last got round to building the garage – which reminds me about the great orchid crisis of 2008. What triggered the flashback was that we’ve just spent a week digging up all the turf on the site of the garage and ferrying it in wheelbarrows to the other side of the garden. The turf is packed with orchids.
It was this issue, looking after the orchids, that brought our original project to a halt for nearly half a year in 2008 because our planning permission required us to pay for a survey to check whether rare orchids were present on the site.
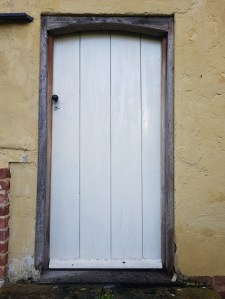
This nice door was made for The Old Brewhouse when it was a farm service building where nobody lived.
It has thin planks with cracks between, and is a heat sink in the house during winter, no matter how much draft proofing is stuffed in and around it.
As a listed building, we’re supposed to make a formal application to the council heritage department and pay a fee if we wish to replace it. Our solution was to leave the old door untouched, apart from a few new screw holes, and build an identical door on the inside of it to double the thickness, cover the cracks and improve its thermal performance. It should make a noticeable difference to the warmth of the room in midwinter.
Other preoccupations, not least the virus, have distracted us from working on the building, though the list of jobs remains long.
In the meantime, we have moved forward on a plan suspended 10 years ago, the construction of a proper outbuilding. You can’t accuse us of rushing things and, as often happens, delay improves an idea.
We had planning permission for a garage and cart lodge, which is valid indefinitely rather than expiring after three years, because we started the work by building a concrete slab for a new entrance from the road plus hard standing with a turning area inside the garden.
I’ve just laid 35 feet of new drain from the house down to the pond, and discovered a layer of what seem to be 18th or early 19th century drains, of a type that a little internet research discovers were named horseshoe drains. I have often noticed, whether at Greek ruins or at Norman Castles, that the remains of old drain and sewage systems fascinate visitors, myself included, so the annoying fact that one of our key drains was totally clogged with tree roots at least produced something nerdishly interesting. Continue reading “Ancient drains”