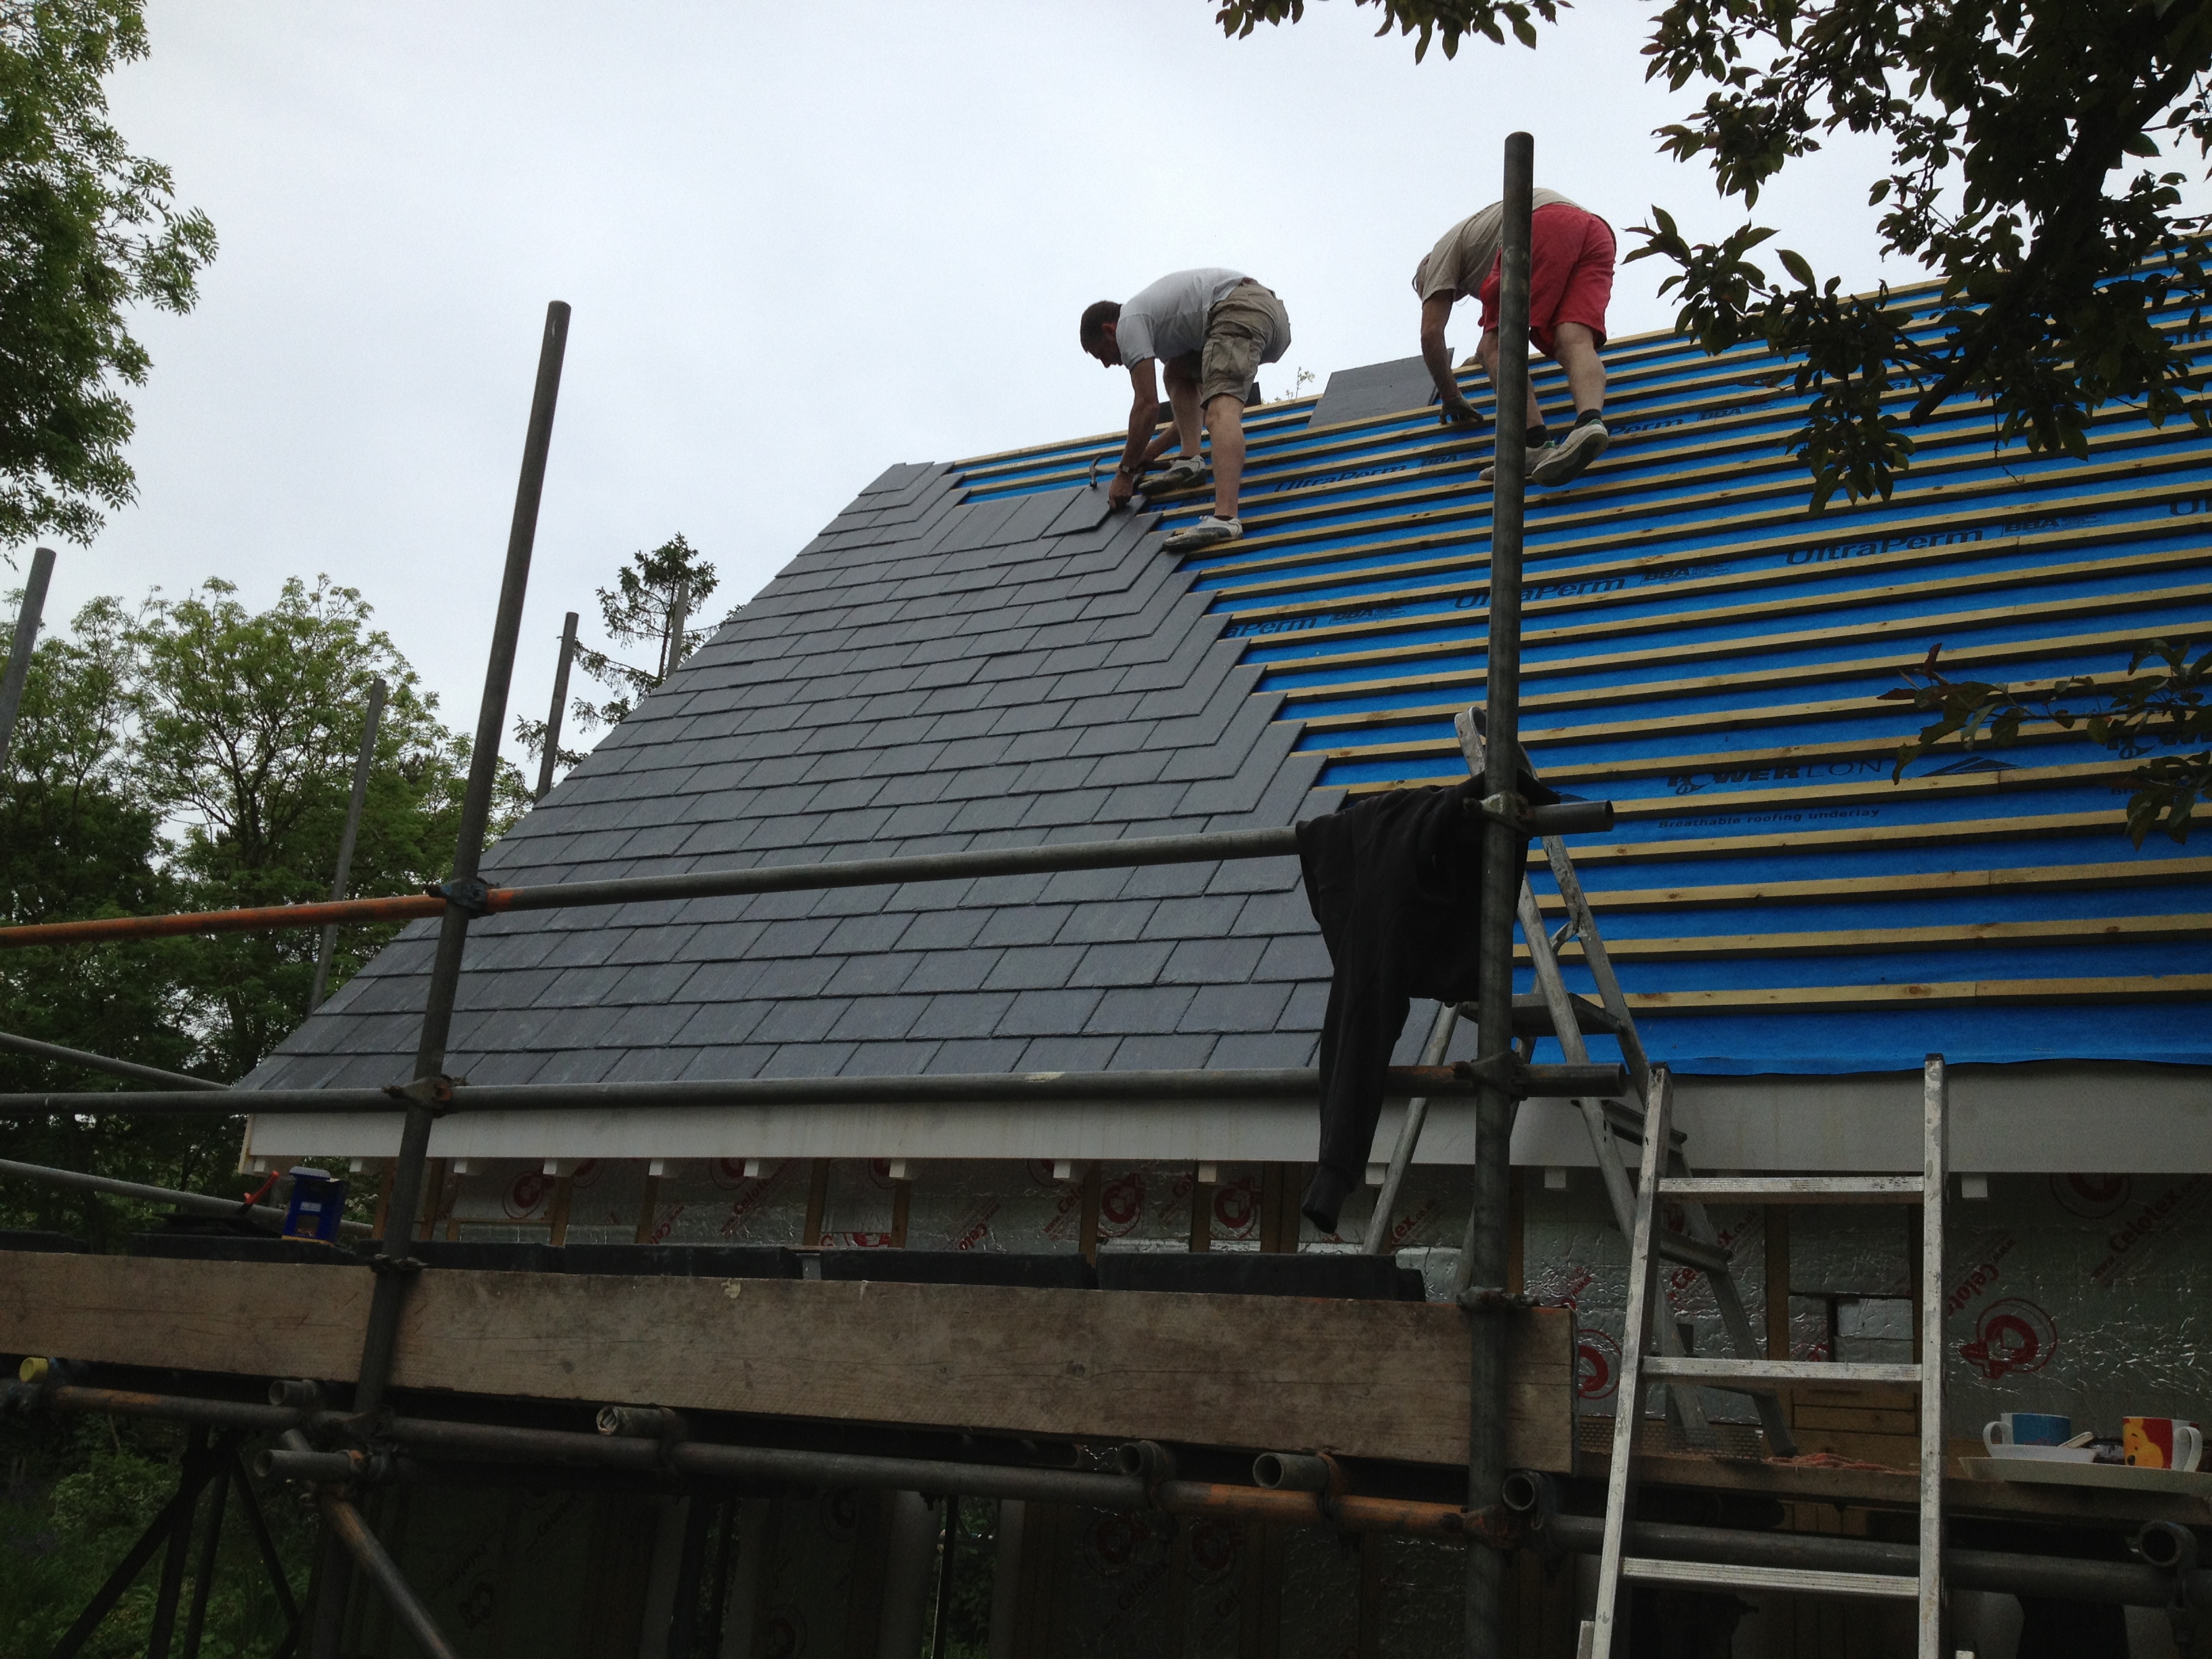
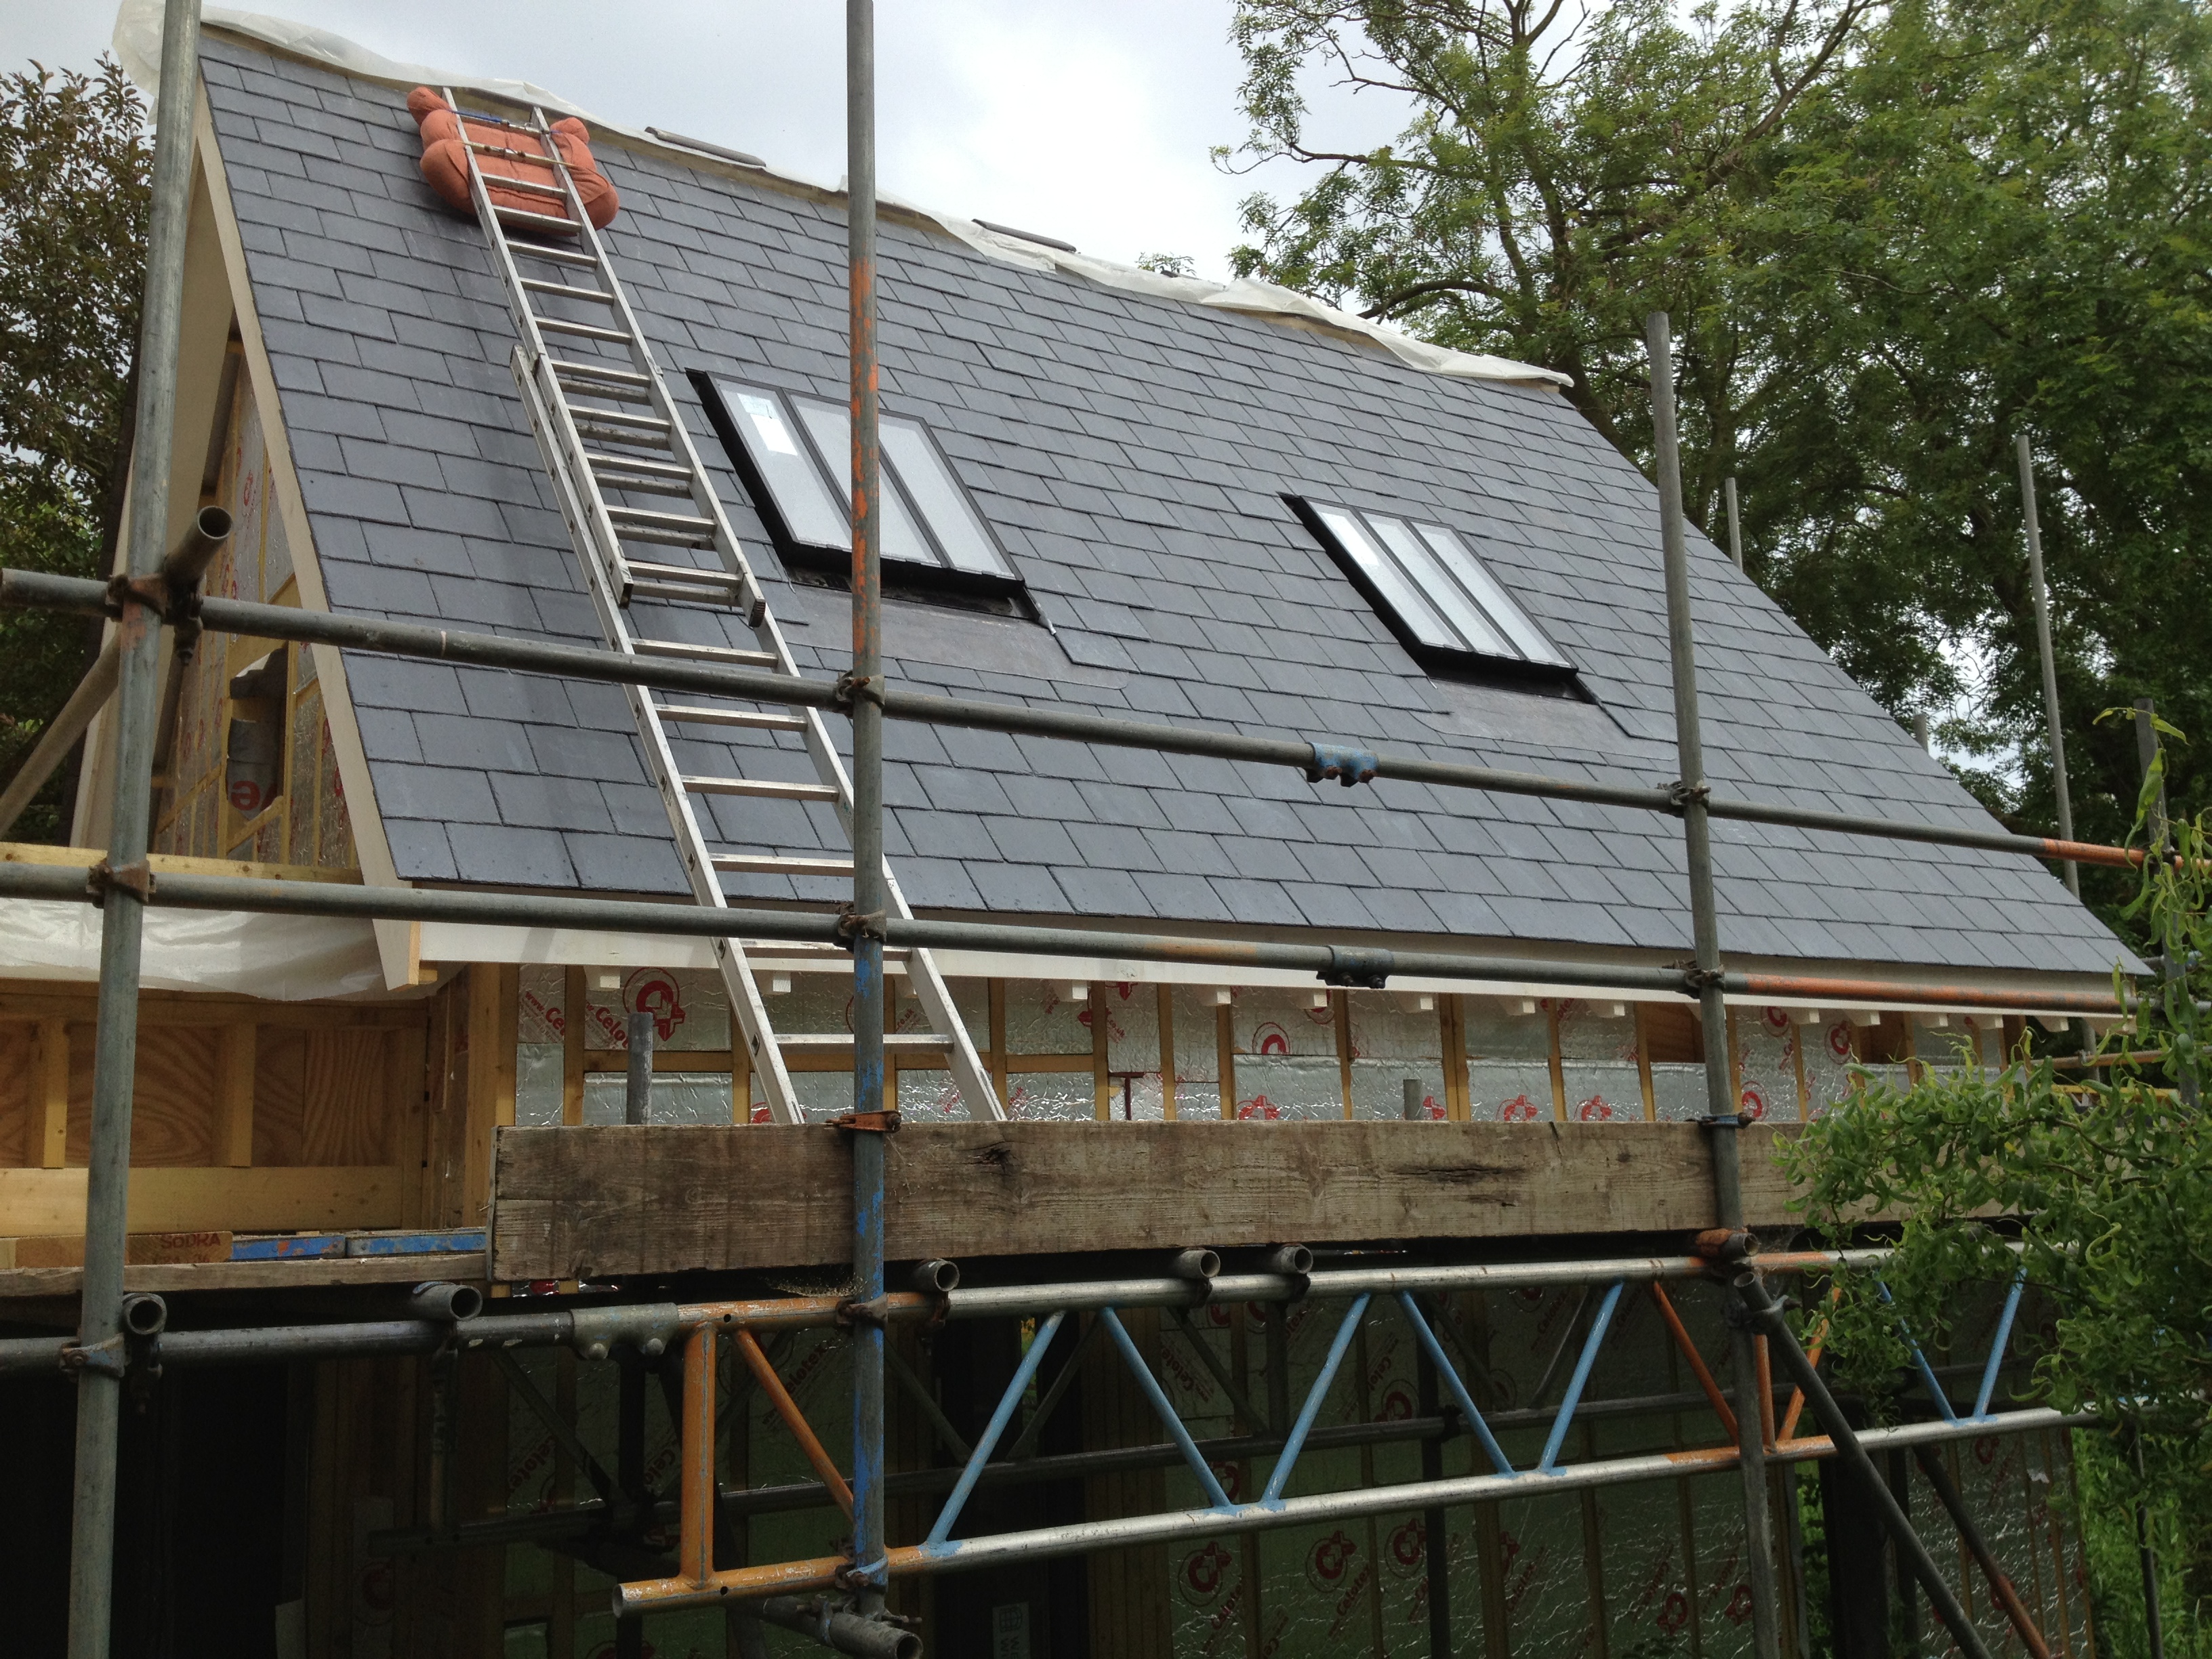
After the frame was finished and most of the insulation installed, there was a delay getting our Canadian slates on site, because the UK supplier had run out of stock. (For an explanation of why they had to come so far, see Continental Drift and the Art of Choosing Slates). Once the slates arrived, the shell of the building was quickly made weathertight, which included fitting the conservation rooflights from The Rooflight Company. These are solidly built, nearly flush and much favoured by conservation officers.
We took charge of ordering the other windows and doors. After extensive research over three or four months, including visits to showrooms and factories, we did detailed price and specification comparisons and settled on windows supplied by Kloeber – a British company based in Cambridgeshire with a showroom in London.
Ordering the windows proved a rather demanding process because there are so many detailed variations of specification that have to be thought through as precisely as possible – top, bottom or side opening, inwards or outwards, tolerances in the size of the openings in the walls, number of trickle vents, the precise colour (there turn out to be an awful lot of shades of grey), whether to have aluminium wood composite with aluminium on the outside, or all aluminium, and whether to have the manufacturer or the builder install. We chose wood and aluminium composite for the windows and all aluminium for the doors. (There was a a special offer of triple glazing for the price of double on the doors, so we snapped it up). The builders installed them all.
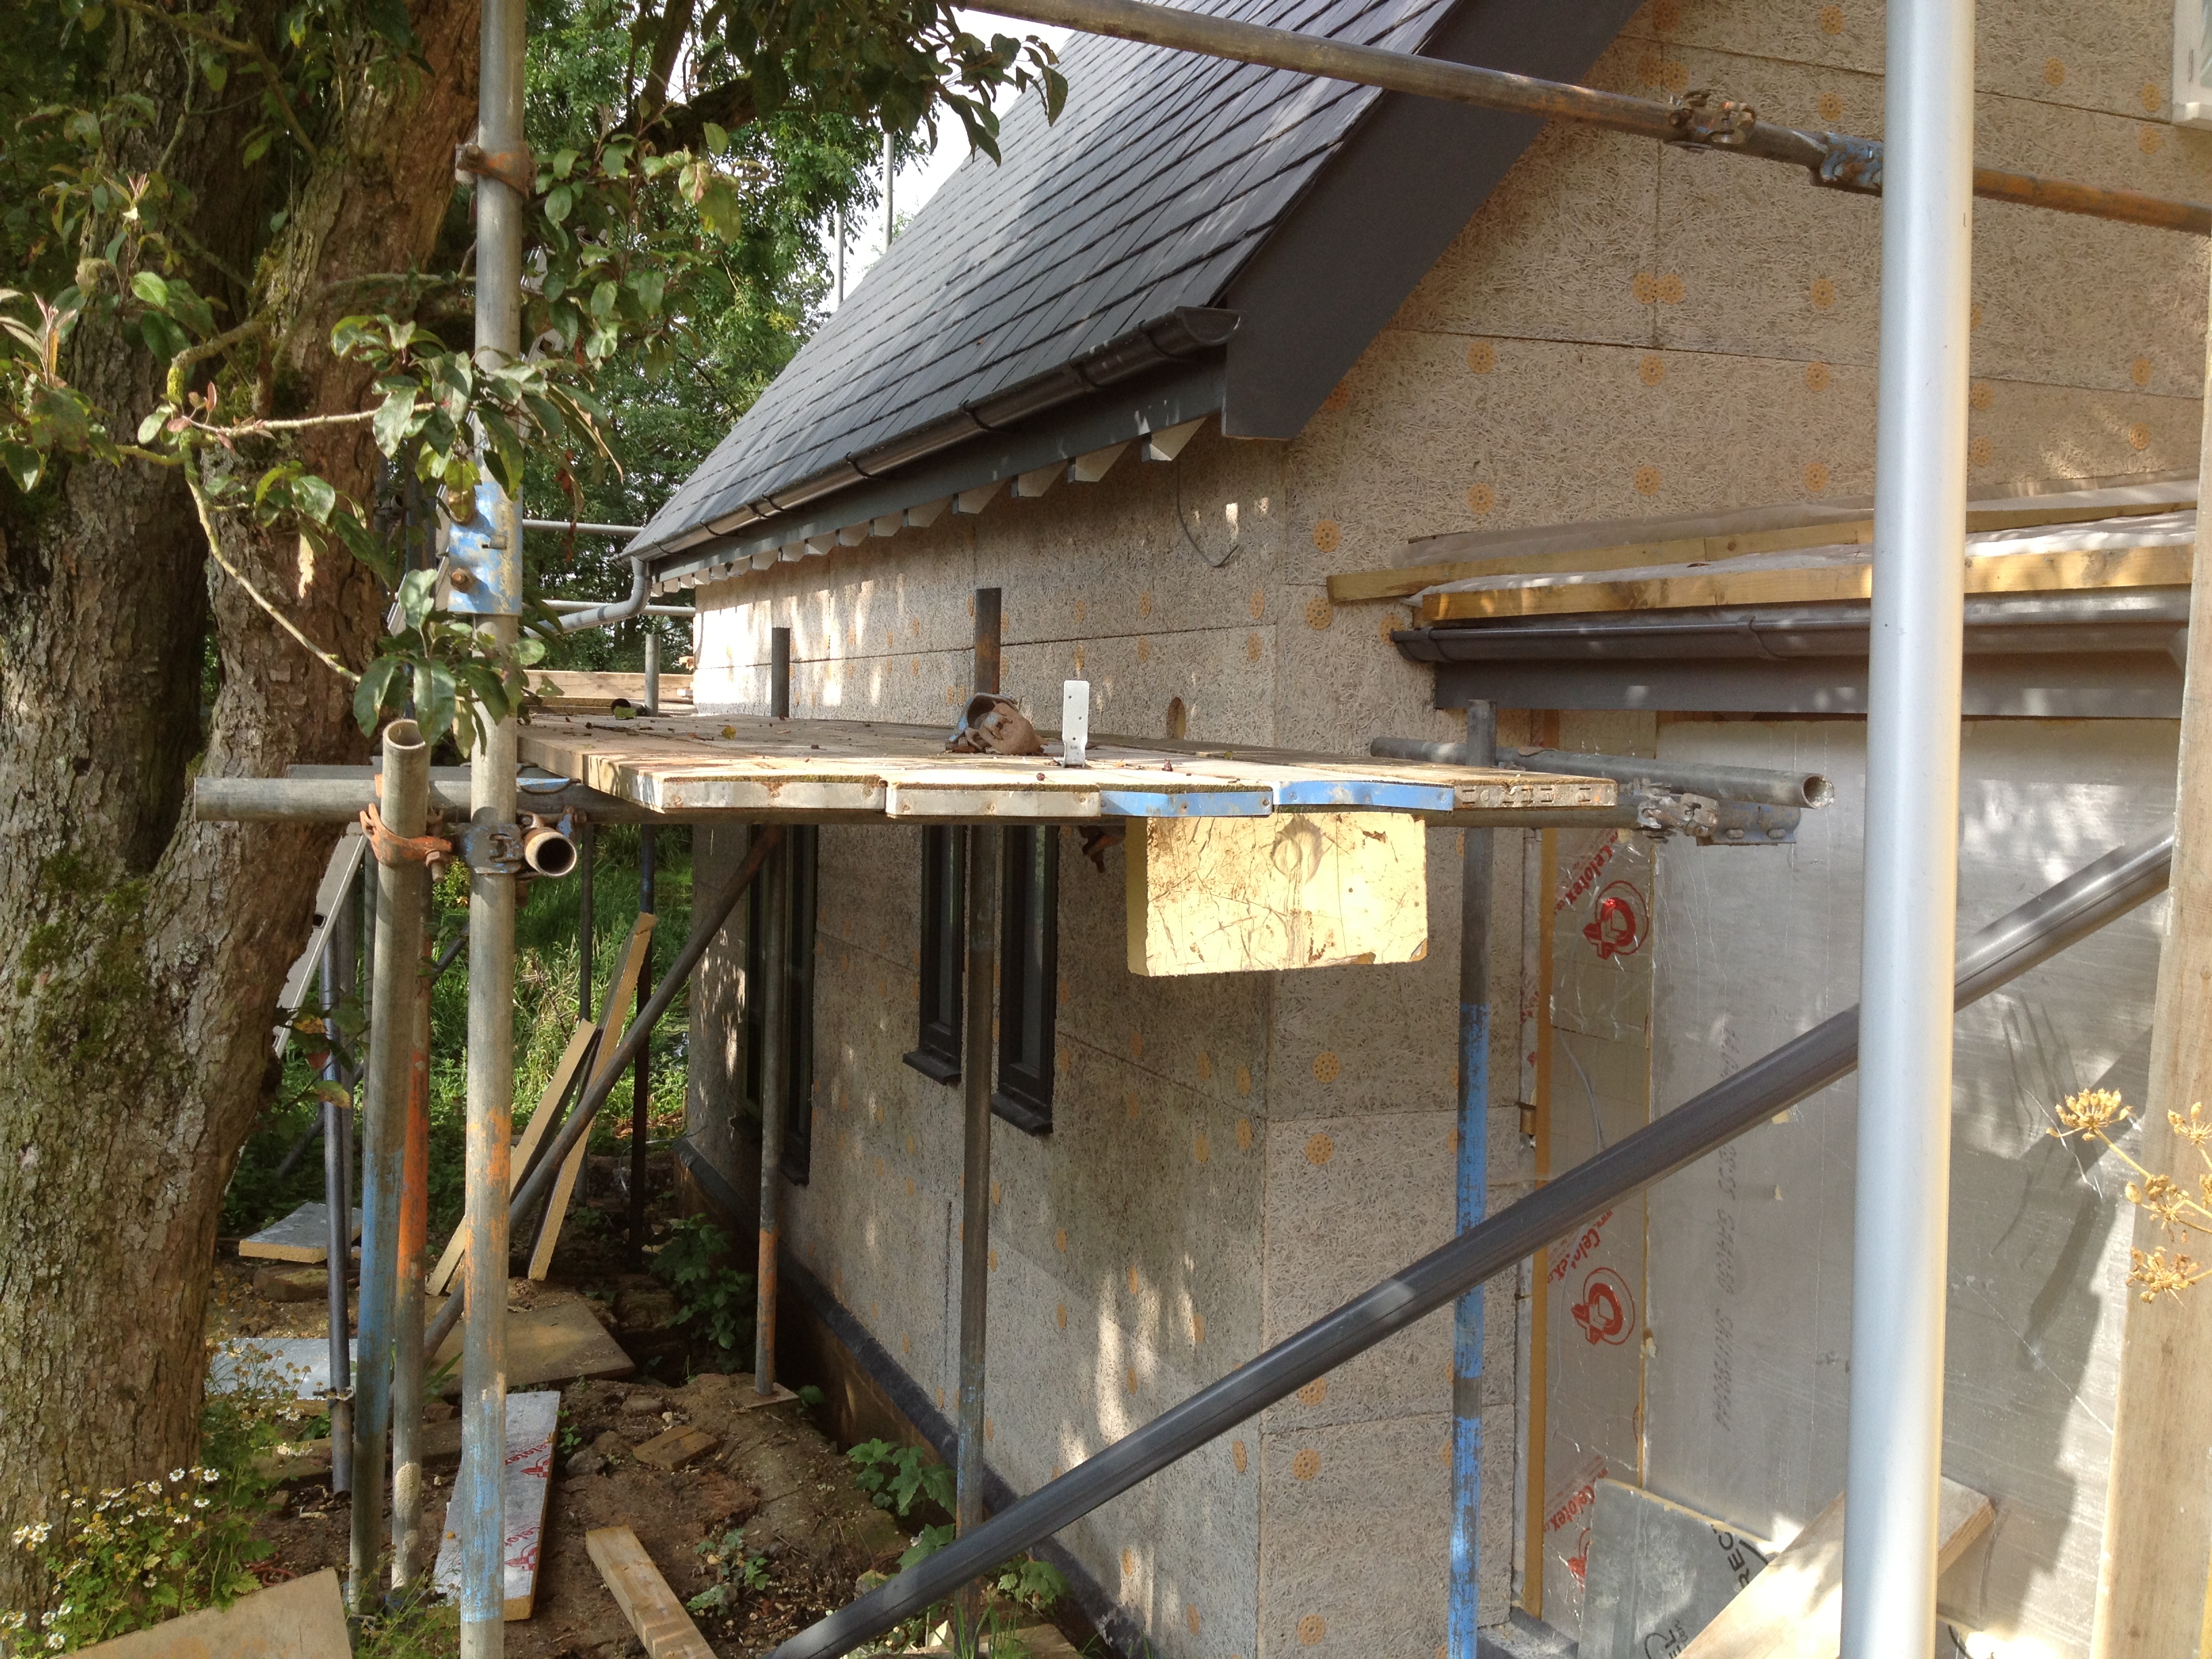
With the windows and doors in, the rest of the insulation was fixed, and then the Savolit board on top. Savolit is very similar to the better known Heraklith (which is more expensive). It was fixed to the timbers using large plastic washers to prevent the screws pulling through. Both types of board are made from thin shavings of wood soaked in a cement mix which turns them into a hard material with many air voids. (You can blow through a Savolit board). They make a tremendous key for plastering.
Savolit can be cut to shape easily. Where the outside edges of the boards cannot be screwed direct to the frame, the makers recommend gluing along the edges with a solvent free adhesive, but Tim and Andrew managed to fit all the board edges expertly to the frame without using glue.
By this stage, the electrician and plumber had been called in to do the first fix, of wiring and piping. This of course has to be done before plasterboarding the internal walls and ceilings and screeding the ground floor. (The screed was laid on top of a layer of Celotex insulation).
We also had to pay a great deal of attention to the detail of the spiral staircase opening, because of the building regulation demand for at least 2 metres of headroom at every point on the stairs. This is not so easy when you come up under a sloping roof, as shown in the photo below. We in fact got a dispensation from our building inspector who said he would allow a lower clearance. But with the help of the staircase supplier and a lot of repeat drawings, in the end we managed to juggle the position and design of the spiral stairs so that they would fit with full headroom. It involved slightly changing the size of the opening after it had been made, by 150 mm.


The stairs were bought from Cottage Craft Spirals of Chapel-en-le-Frith, in the Derbyshire Peak District. This followed a long search among suppliers of spiral staircases, a large majority of whom were Italian companies exporting kits to the UK. We looked at at least 20 of these stairs, didn’t like any of the designs and thought they were also rather flimsy.
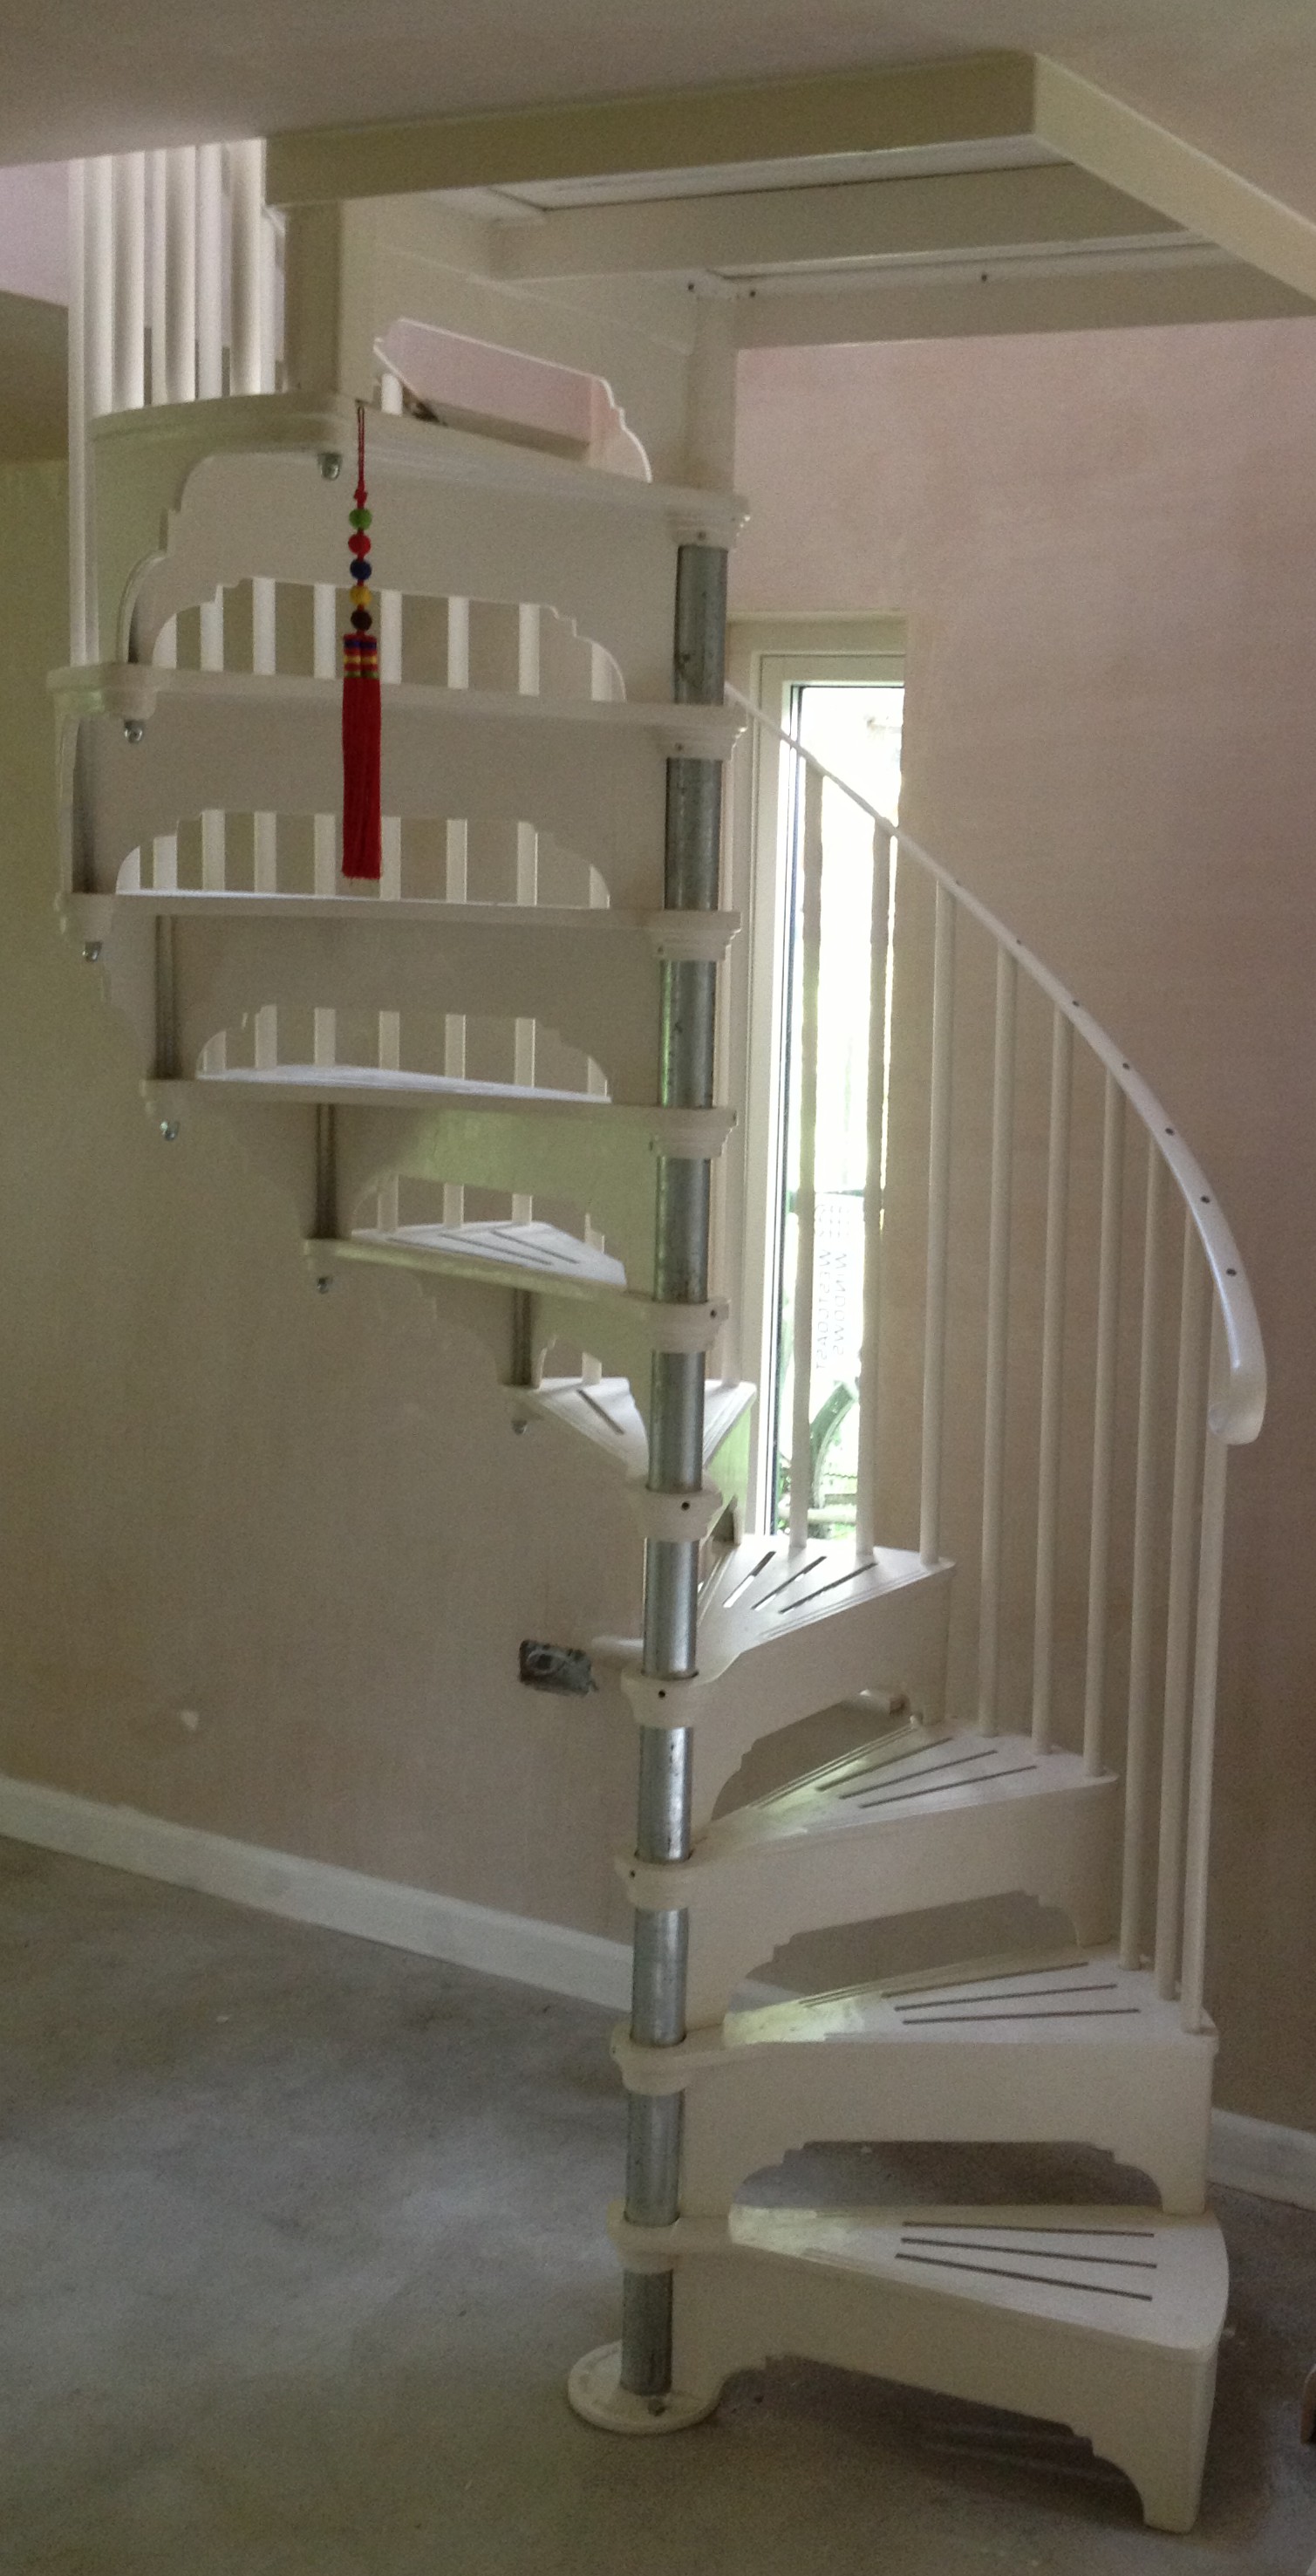
Cottage Craft Spirals makes everything in England, including the cast aluminium stair treads. They invited us to their factory, collecting us from Macclesfield station and taking us for a scenic half hour drive through the Peak District, so it was a very pleasant day out. Their stairs come in a variety of designs, can be tailored easily to individual specifications, look good and have a tremendously solid feel. They cost considerably more than the cheapest Italian kits, but no more than some of the allegedly bespoke upmarket Italian spirals we looked at, which didn’t look bespoke at all when we actually inspected examples.

With the first fix done, the internal walls and ceilings finished and plastered, the builders were ready to move on to the finishing stages. This included tiling and plumbing the shower room (actually a wet room as we dispensed with a shower enclosure and completely tiled it), painting, finishing the electrics, installing a third Conservation Rooflight in the hallway near the new front door; and finally hanging a lovely oak front door made of wide, solid planks by Jonathan Read Ltd of Framlingham (trading as Malcolm Neeve).
Next: a traditional plaster for the outside of a modern building.
